[A-00106]TypeScriptを使ってみた
typescriptのインストールから基本的な使い方までを記載しておきます。
下記の記事を参考にさせていただきました。
・インストール
インストールコマンドは下記です。インストーラの中でmkdirなどを実行するようなのでsuperuser権限で実行しておくほうが良いかもしれません。
sudo npm install -g typescript最新版をインストールする場合は下記を実行してください。
npm install -g typescript@next・基本的な使い方
まずテスト用のディレクトリを作成してそこでnpm initを実行します。
mkdir ts_test1 && chmod 777 ts_test1MacBook-Pro:ts_test1$ pwd
/Users/anonymous/Documents/js/ts_test1
MacBook-Pro:ts_test1$ npm init --y次に必要な資材をインストールします。
npm install typescript ts-loader webpack webpack-cli webpack-dev-server --save-dev
・とりあえず動かしてみる
typescriptを動かしてみます。tscコマンドを使用してtypescript→javascriptに変換して、npmで実行するという順序です。ts_test1ディレクトリ直下にtest.tsを作成してください。
const message:string = 'Here it is.'
console.log(message)
MacBook-Pro:ts_test1$ tsc test.ts
MacBook-Pro:ts_test1$ node test.js
Here it is.・プロジェクト環境を構築する。
package.jsonを書き換えます。
{
  "name": "ts_test1",
  "version": "1.0.0",
  "description": "",
  "main": "index.js",
  "scripts": {
    "build": "webpack --mode=development",
    "start": "webpack serve --mode=development",
    "test": "echo \"Error: no test specified\" && exit 1"
  },
  "keywords": [],
  "author": "",
  "license": "ISC",
  "devDependencies": {
    "ts-loader": "^9.4.4",
    "typescript": "^5.1.6",
    "webpack": "^5.88.2",
    "webpack-cli": "^5.1.4",
    "webpack-dev-server": "^4.15.1"
  }
}
次にwebpack.config.jsを作成します。この設定ファイルでエントリーポイントなどを定義します。
const path = require('path');
module.exports = {
    entry: {
        bundle: './src/app.ts'
    },
    output: {
        path: path.join(__dirname,'dist'),
        filename: '[name].js'
    },
    resolve: {
        extensions:['.ts','.js']
    },
    devServer: {
        static: {
            directory: path.join(__dirname, "dist"),
        },
    },
    module: {
        rules: [
            {
                test:/\.ts$/,loader:'ts-loader'
            }
        ]
    }
}
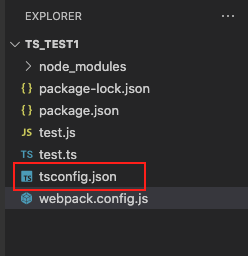
webpack.config.jsを作成したら下記のコマンドを実行してtsconfig.jsonを作成します。
tsc --init下記のようにtsconfig.jsonが作成されます。
tsconfig.jsonの中身は下記のとおりです。必要に応じて書き換えます。
{
  "compilerOptions": {
    /* Language and Environment */
    "target": "ES2016",
    /* Modules */
    "module": "commonjs",
    /* Interop Constraints */
    "esModuleInterop": true,
    /* Type Checking */
    "strict": true,
    /* Completeness */
    "skipLibCheck": true
  }
}
次にソースファイル格納用のディレクトリを作成します。
mkdir src && chmod 777 src
mkdir dist && chmod 777 dist
srcディレクトリには下記の2ファイルを作成します。
export class Person {
    constructor(private name:string, private age:number){}

    public introduce(e : HTMLElement | null) : void {
        if(e){
          e.innerHTML = 'My name is ' + this.name + '. My age is ' + this.age + ' years old. Nice to meet you!';
        }
    }
}
import {Person} from './person';
var e = document.getElementById('output');
var firstmeet = new Person('Hiroshi Nakagawa',48);
firstmeet.introduce(e);続いてdistディレクトリには下記のファイルを作成します。
<!DOCTYPE html>
<html lang='ja'>
  <head>
    <meta charset="utf-8">
    <title>Hello typescript</title>
  </head>
  <body>
    <div id="output"></div>
    <script src="bundle.js"></script>
  </body>
</html>
上記ファイルを作成したらts_test1直下にて下記のコマンドを実行します。
npm startMacBook-Pro:ts_test1$ npm start
> ts_test1@1.0.0 start
> webpack serve --mode=development
<i> [webpack-dev-server] Project is running at:
<i> [webpack-dev-server] Loopback: http://localhost:8080/
<i> [webpack-dev-server] On Your Network (IPv4): http://192.168.1.4:8080/
<i> [webpack-dev-server] On Your Network (IPv6): http://[fe80::1]:8080/
<i> [webpack-dev-server] Content not from webpack is served from '/Users/anonymous/Documents/js/ts_test1/dist' directory
asset bundle.js 266 KiB [emitted] (name: bundle)
runtime modules 27.3 KiB 12 modules
modules by path ./node_modules/ 178 KiB
modules by path ./node_modules/webpack-dev-server/client/ 71.8 KiB 16 modules
modules by path ./node_modules/webpack/hot/*.js 5.3 KiB
./node_modules/webpack/hot/dev-server.js 1.94 KiB [built] [code generated]
+ 3 modules
modules by path ./node_modules/html-entities/lib/*.js 81.8 KiB
./node_modules/html-entities/lib/index.js 7.91 KiB [built] [code generated]
./node_modules/html-entities/lib/named-references.js 73 KiB [built] [code generated]
+ 2 modules
./node_modules/ansi-html-community/index.js 4.16 KiB [built] [code generated]
./node_modules/events/events.js 14.5 KiB [built] [code generated]
modules by path ./src/*.ts 639 bytes
./src/app.ts 243 bytes [built] [code generated]
./src/person.ts 396 bytes [built] [code generated]
webpack 5.88.2 compiled successfully in 3591 ms下記のURLにアクセスします。
ブラウザで下記のように表示されればOKです。

・クラスの作り方について
typescriptでクラスを作成する際は下記の通りです。例えば自動車のクラスを作成した時、下記の通りに実装しました。メンバ変数(フィールド変数)、コンストラクタ、メソッドの三つの基本的な要素をクラスに実装しました。
export class Car {

    // Field variable
    modelName: string;
    type: string;
    gasoline: number;
    battery: number;

    //Constructor
    constructor(modelName: string
        , type: string
        , gasoline: number
        , battery: number) {
        this.modelName = modelName;
        this.type = type
        this.gasoline = gasoline;
        this.battery = battery;
    }

    // Method
    run() {
        if (this.gasoline == 0) {
            console.log("gasoline is empty.");
        }
        console.log("Car is running");
        this.gasoline = this.gasoline - 1;
    }
}
上記のクラスを外部のファイルで使用するために「class」宣言の前に[export]キーワードをつけます。
クラスのインスタンスを作成して呼び出すには下記の通りに実装できます。
import { Car } from "./car";

var vehicle = new Car("トヨタのセダン","セダンタイプ", 50, 100);
vehicle.run();
上記で作成したcar.ts, playground.tsはsrcディレクトリ下に作成します。
下記のコマンドを実行してtypescript->javascriptに変換します。
tsc下記の画像の通り、それぞれのtypescriptファイルに対して.jsファイルが作成されます。
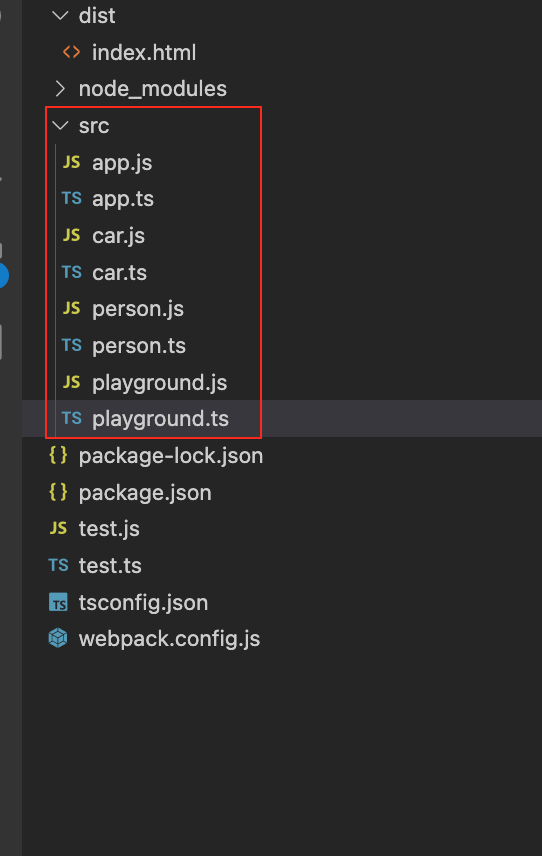
playground.jsを実行するとcar.tsで定義したコンソールログが出力されます。
MacBook-Pro:app1$ node ./src/playground.js
Car is running
以上がクラスの基本的な実装方法でした。
・JSにコンバートせずに.tsを実行する
npmでts-nodeというモジュールをインストールします。
npm install ts-nodeインストールしたら下記のコマンド.tsファイルを直接実行できます。
MacBook-Pro:app1$ npx ts-node ./src/playground.ts
Car is running
・定数の作り方
次に定数の作り方です。下記の通り、外部で使用することを考えてexport修飾子をつけます。
export const hello = "Hello,World";
export const introduce = "Nice to meet you."
export const angry = "Get out here!";
次にコンストの使い方は下記の通りです。
import { Car } from "./car";
import { hello, introduce, angry } from "./constants";

var vehicle = new Car("トヨタのセダン","セダンタイプ", 50, 100);
vehicle.run();

console.log(hello);
console.log(introduce);
console.log(angry);
実行すると下記のようになります。
MacBook-Pro:app1$ npx ts-node ./src/playground.ts
Car is running
Hello,World
Nice to meet you.
Get out here!
・関数の作成
exportを使用することで外部に公開できます。言い換えれば外部ファイルはexportがついているクラスやファンクションをimportできます。次に公開関数を作成して使ってみます。
export function doSay(what: string): void {
    console.log(what);
}
上記の関数を外部で使用するコードは下記です。
import { Car } from "./car";
import { hello, introduce, angry } from "./constants";
import { doSay } from "./func";

var vehicle = new Car("トヨタのセダン","セダンタイプ", 50, 100);
vehicle.run();

console.log(hello);
console.log(introduce);
console.log(angry);

doSay("Typescript is static typical programming-language.")
実行すると下記のようになります。
MacBook-Pro:app1$ npx ts-node ./src/playground.ts
Car is running
Hello,World
Nice to meet you.
Get out here!
Typescript is static typical programming-language.
・インターフェースの作成方法
インターフェースを作る場合下記の通りになります。
export interface Fruits {
    name: string
    type: string
    season: string
    price: number
}
import { Fruits } from "./fruits";
export class Apple implements Fruits {
name: string;
type: string;
season: string;
price: number;
constructor(name: string, type: string, season: string, price: number) {
this.name = name;
this.type = type;
this.season = season;
this.price = price;
}
public eat() {
console.log("It's delicious!");
}
}import { Car } from "./car";
import { hello, introduce, angry } from "./constants";
import { doSay } from "./func";
import { Apple } from "./apple";
var vehicle = new Car("トヨタのセダン","セダンタイプ", 50, 100);
vehicle.run();
console.log(hello);
console.log(introduce);
console.log(angry);
doSay("Typescript is static typical programming-language.")
var apple = new Apple("ourin", "blue apple", "spring", 180);
apple.eat();実行結果は下記の通り
MacBook-Pro:app1$ npx ts-node ./src/playground.ts
Car is running
Hello,World
Nice to meet you.
Get out here!
Typescript is static typical programming-language.
It's delicious!
・Appendix
参考サイトはこちら
コメントを残す