[A-00100]DocumentAIのCustomProcessorを作成する
GCPが提供するDocumentAIのカスタムプロセッサーの作成方法を記載しておく。
GCP DocumentAIのコンソールはこちら
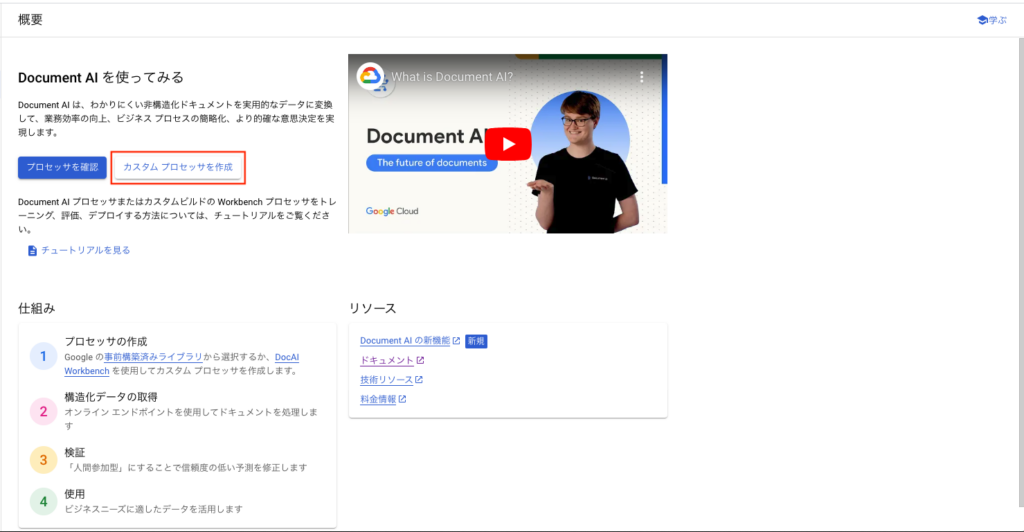
・カスタムプロセッサを作成する
下記の画面にて「カスタムプロセッサを作成」ボタンを押下する
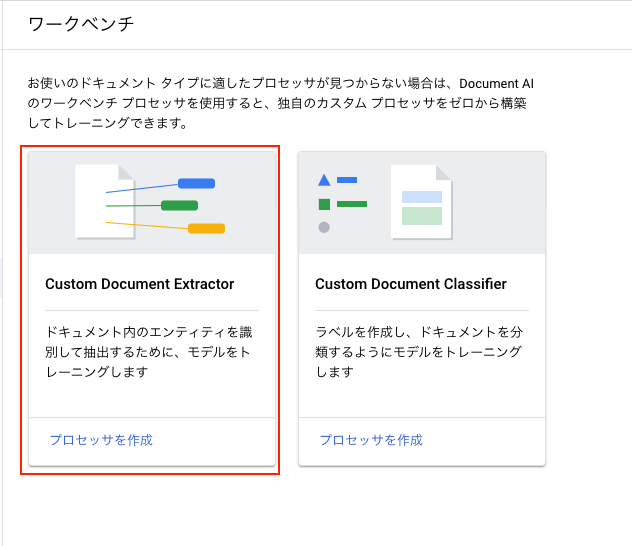
今回はEntity抽出するプロセッサを作成するので[Custom Document Extractor]を選択します。
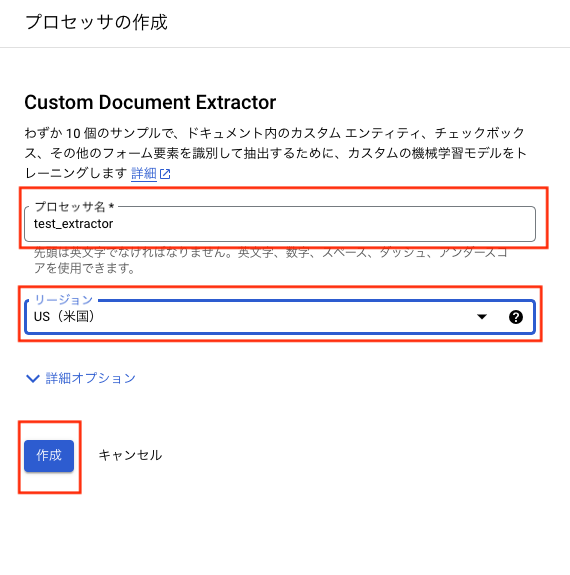
任意の名前を入力し、locationをUSに指定して作成します※US,EU以外に選べません。
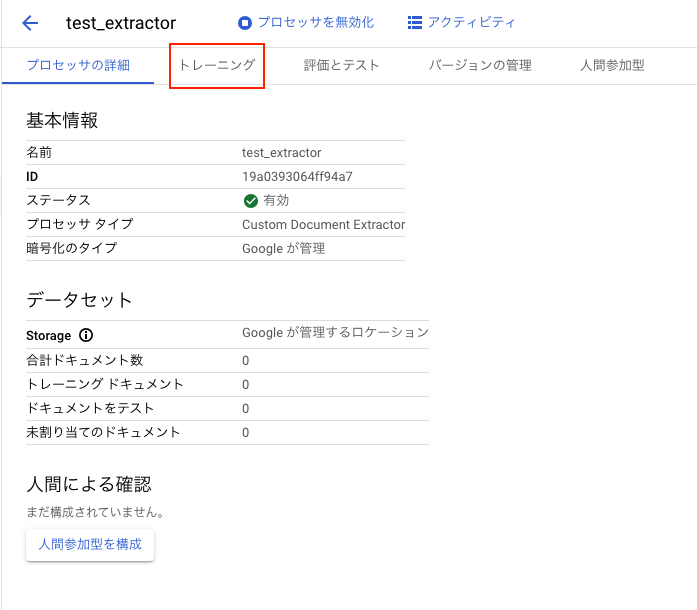
作成されると下記の画面が表示されます。[トレーニング]タブを押下してデータセットの作成を行います。
押下するとCloudStorageを作成する旨のメッセージが表示されますが[続行]ボタンを押下して次へ進んでください
押下すると下記の進行画面になります。

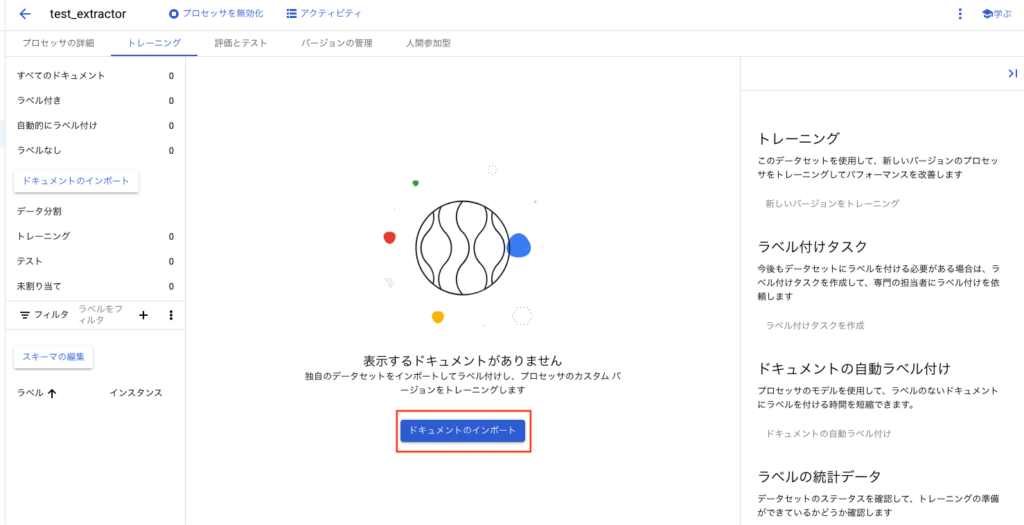
上記の処理が終わると下記の画面に行きます。[ドキュメントのインポート]ボタンを押下してCloudStorageからドキュメントをインポートしますが、その前にCloudStorageにファイルをアップロードしておきます。
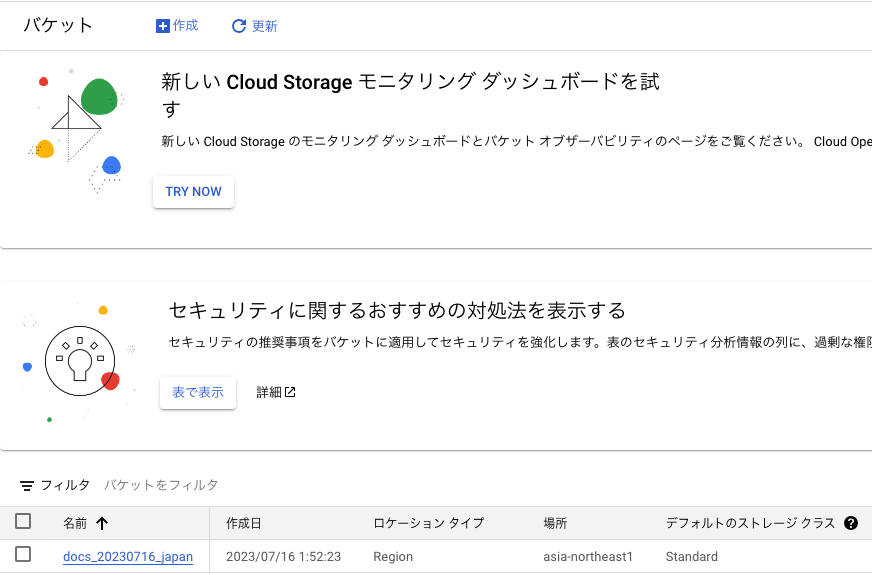
事前にドキュメントを格納するStorageを作成しておきます。
サンプルファイルはこちら
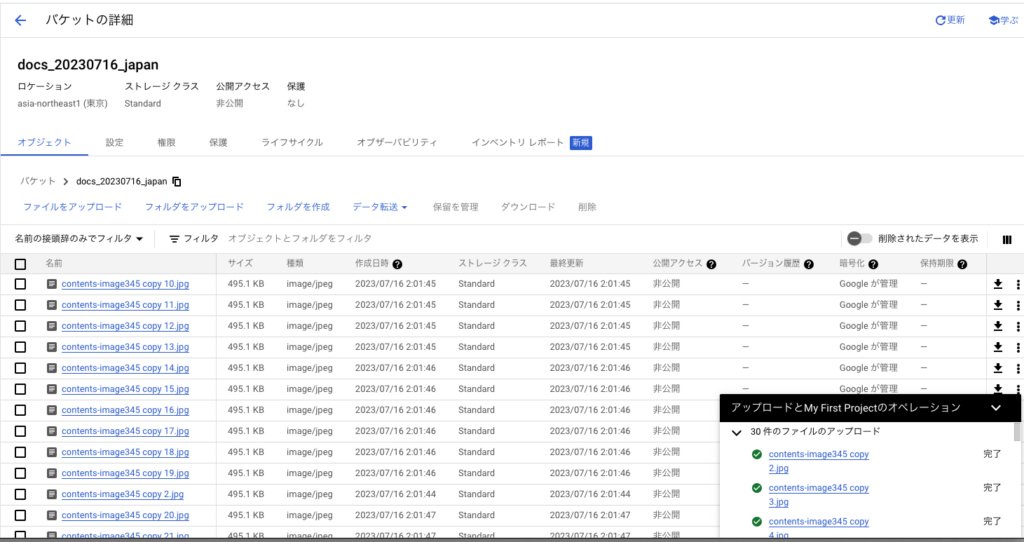
サンプルファイルをコピーして30個程度にしてアップロードします。
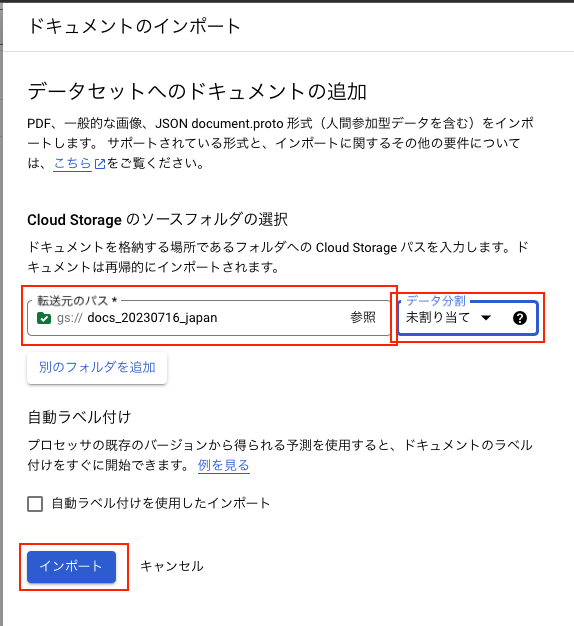
下記の画面にて[ドキュメントをインポート]ボタンを押下します。
下の画像の通りの設定で[インポート]ボタンを押下します。
ボタンを押下すると下記の進行画面になりますので完了までしばらく待ちます。
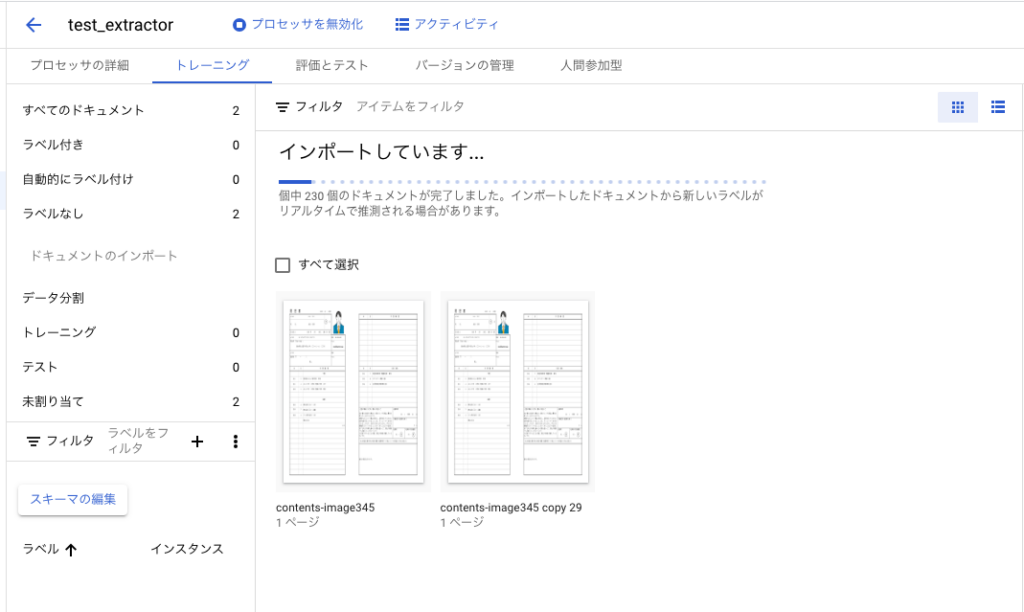
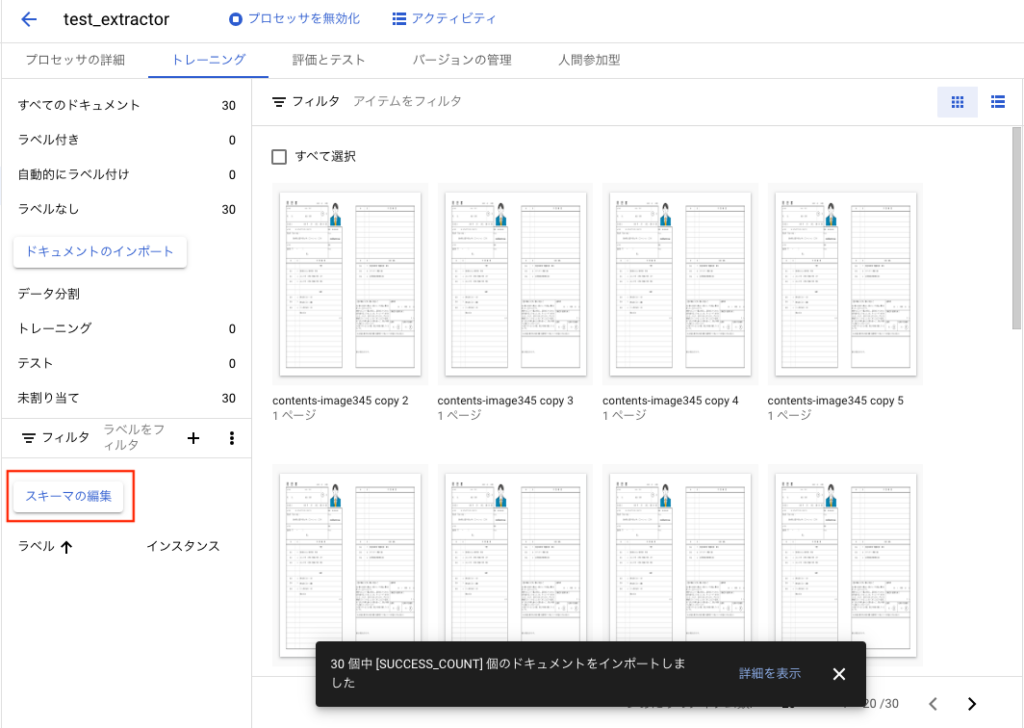
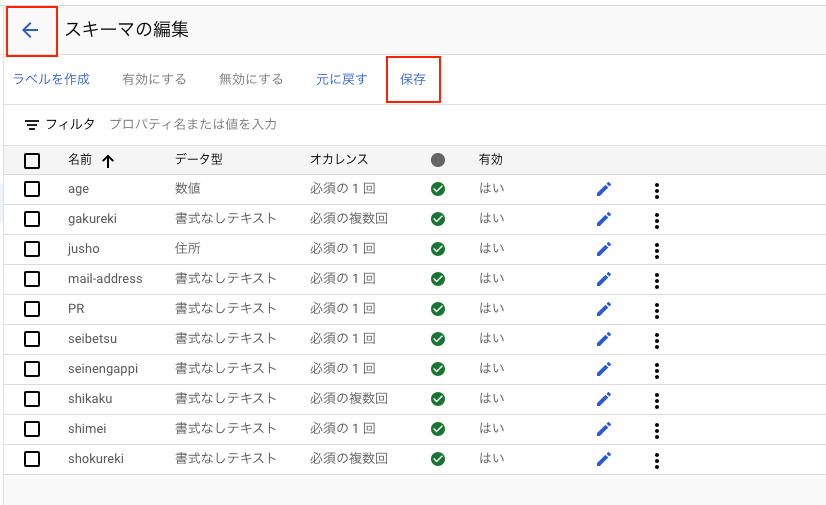
完了すると下記のような画面になります。次にスキーマ(Entityラベル)の編集を行います。
[スキーマの編集]ボタンを押下します。
[ラベルを作成]タブを押下します。
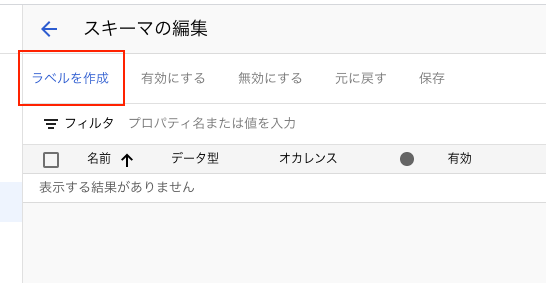
履歴書データにラベル付するので自分のラベリングしたい項目だけ作成してください。
今回は下記の項目だけ作成しました。

次にドキュメントへのラベル付を行います。
これは手作業でやる必要があります。トレーニング用に10件以上、テスト用に10件以上をラベル付しておく必要があります。
画面上部の[保存]タブを押下し、[戻る矢印]を押下して前の画面に戻ります。
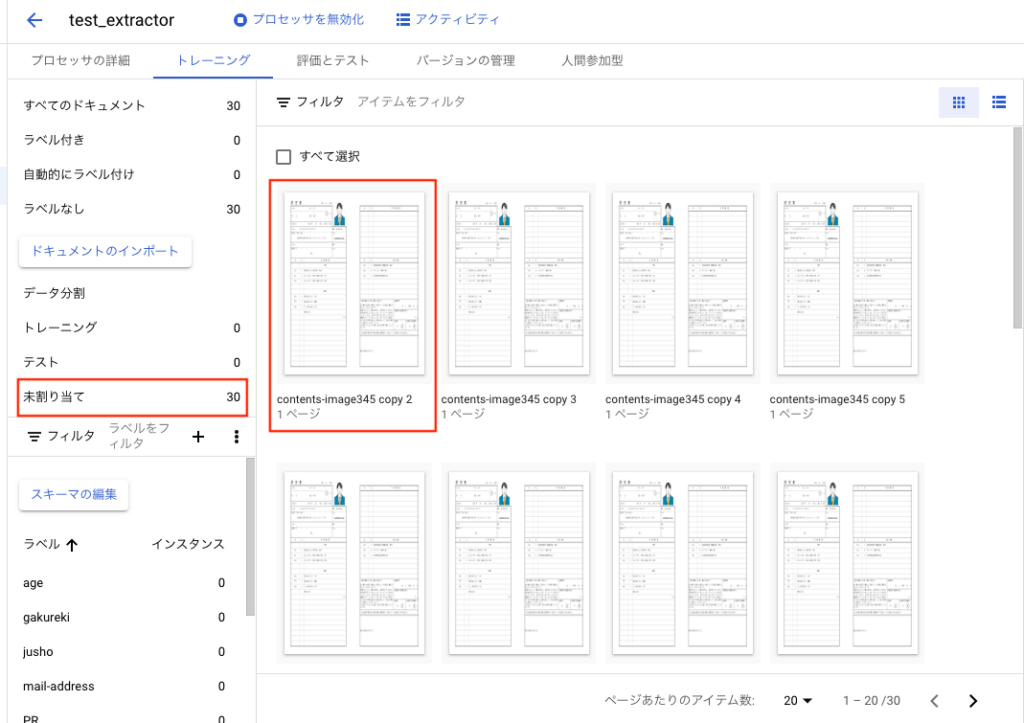
画面左側に表示されている[未割り当て]が30となっていますが、これはラベル付していないドキュメントが30あるという意味です。ラベル付を行いますので適当な履歴書データをダブルクリックします。
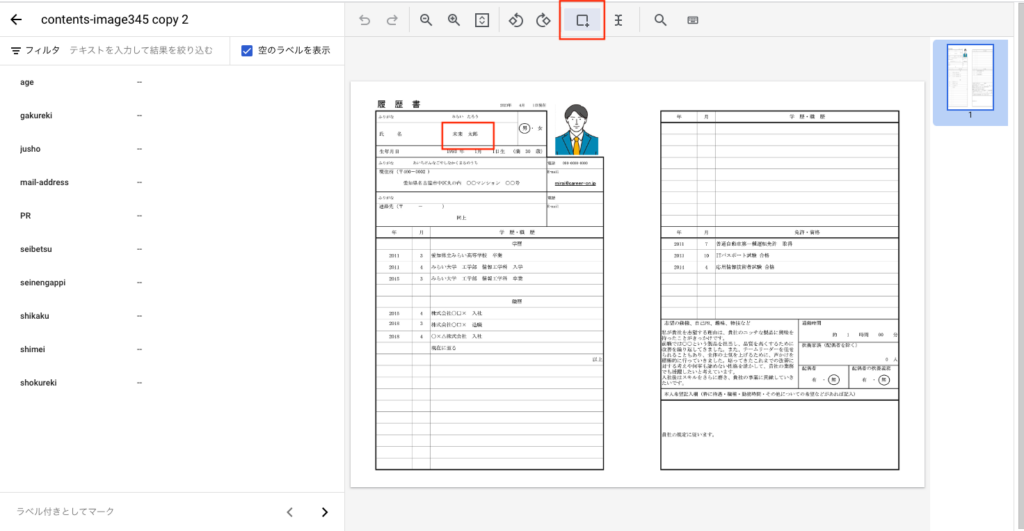
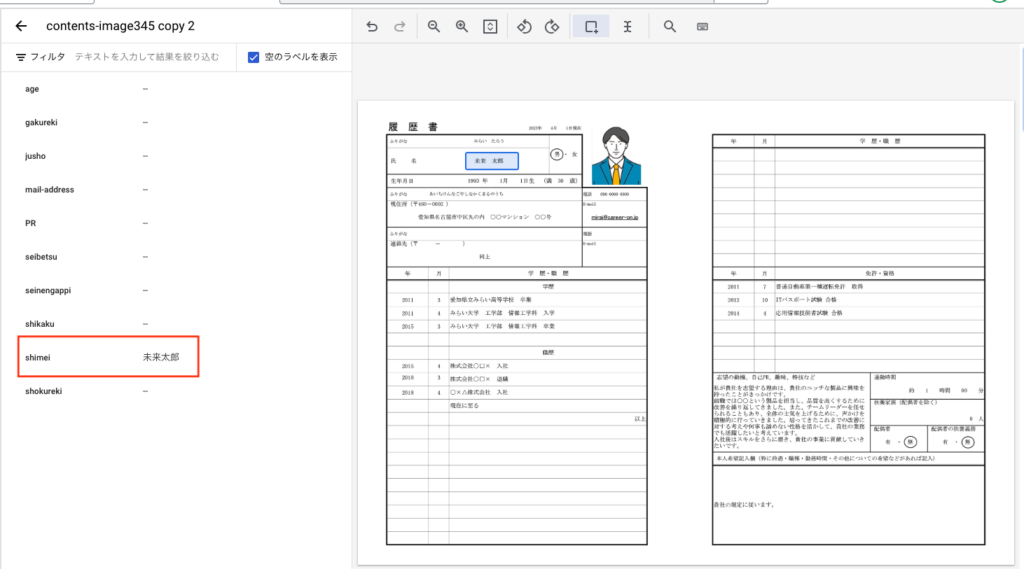
遷移後、下記の画面になります。上の赤枠で囲まれているアイコンは選択ツールです。
これは選択範囲を指定して、エンティティのラベル付をするツールです。
試しに氏名の箇所を選択してみます。
氏名の部分を選択するとセレクトボックスが表示されます。[shimei]を選択してください。
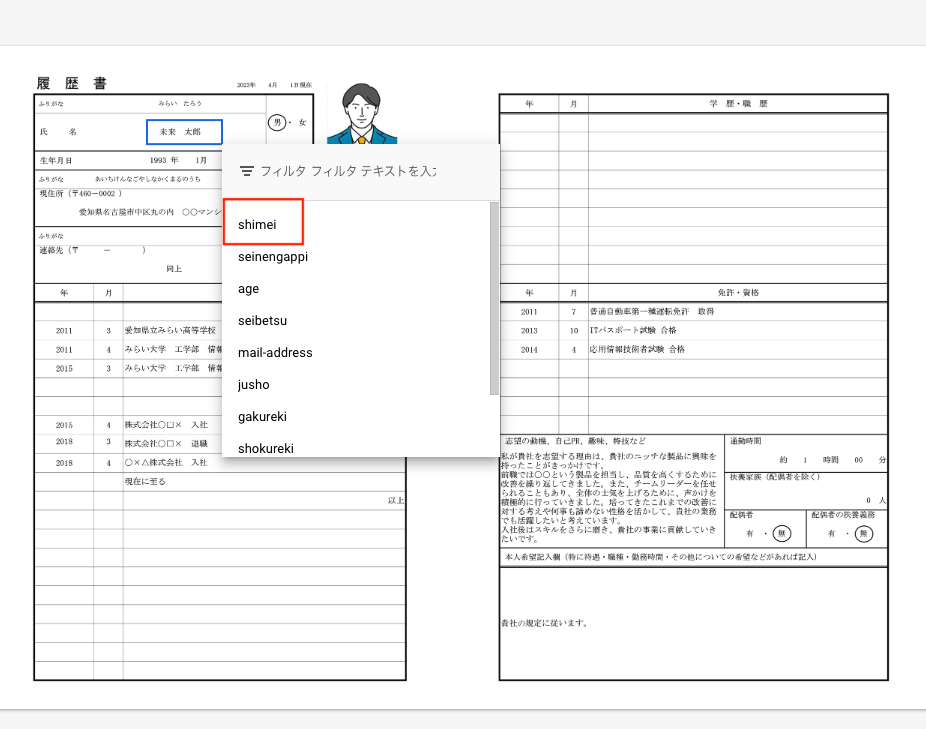
選択すると画面左側のスキーマ表示欄に選択した名前が値として登録されます。
この作業を繰り返し行います。
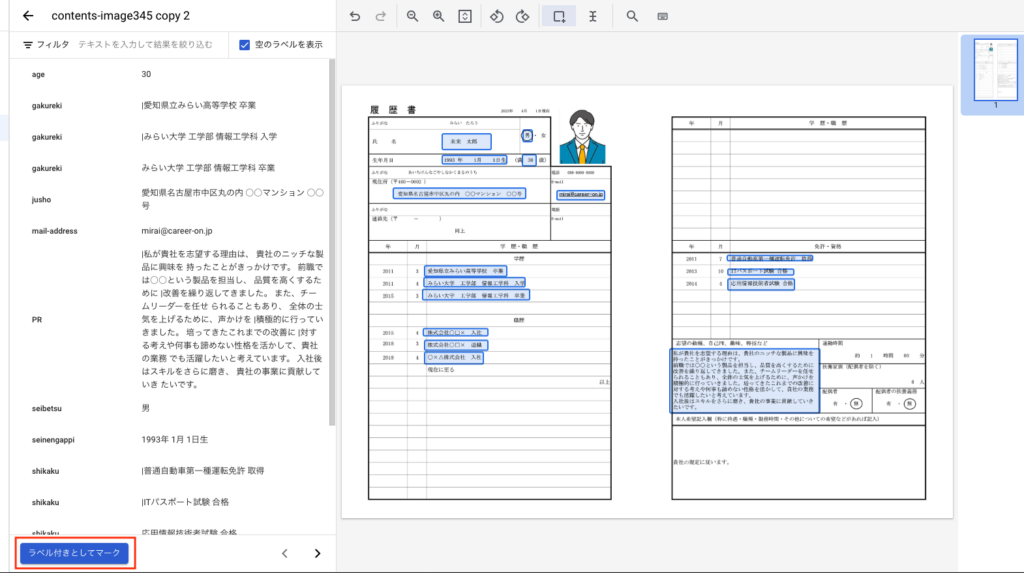
ラベル付が完了したら下記のようになります。
[ラベル付きとしてマーク]ボタンを押下してこのドキュメントの編集は終了します。
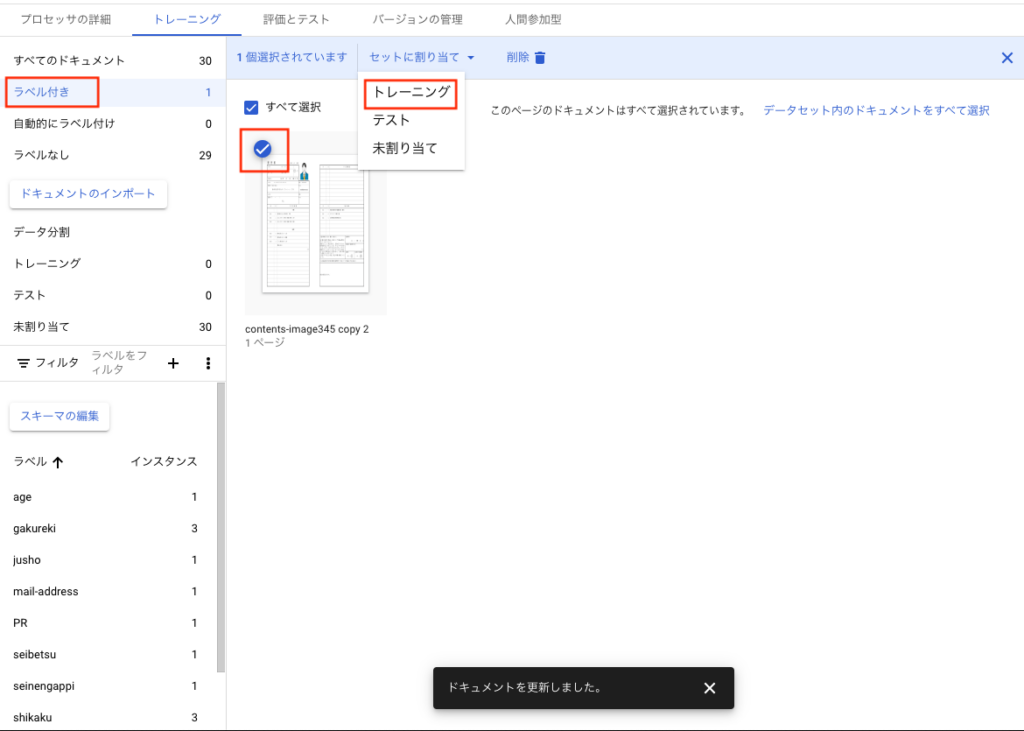
前の画面に戻り、編集した履歴書に対して[トレーニング]にするか[テスト]にするかをわりあてます。
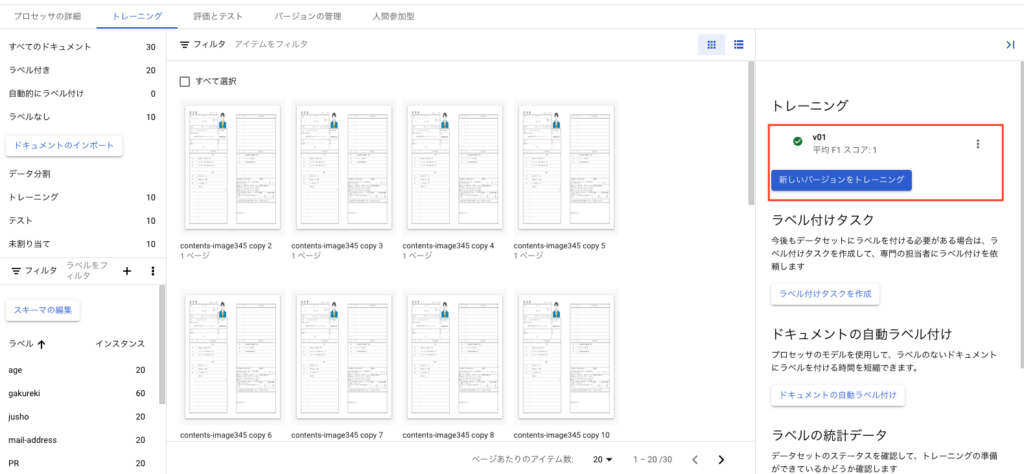
下記のキャプチャのとおり、ラベル付されたら左側パネルに[ラベル付き]が1と表示されます。これをクリックすると
ラベル付された履歴書だけが表示されます。履歴書サムネイルの左上をクリックして選択した状態にし、
[セットに割り当て]タブを押下して[トレーニング]を選択します。
上記の作業を繰り返してトレーニング用を10件、テスト用を10件にします。
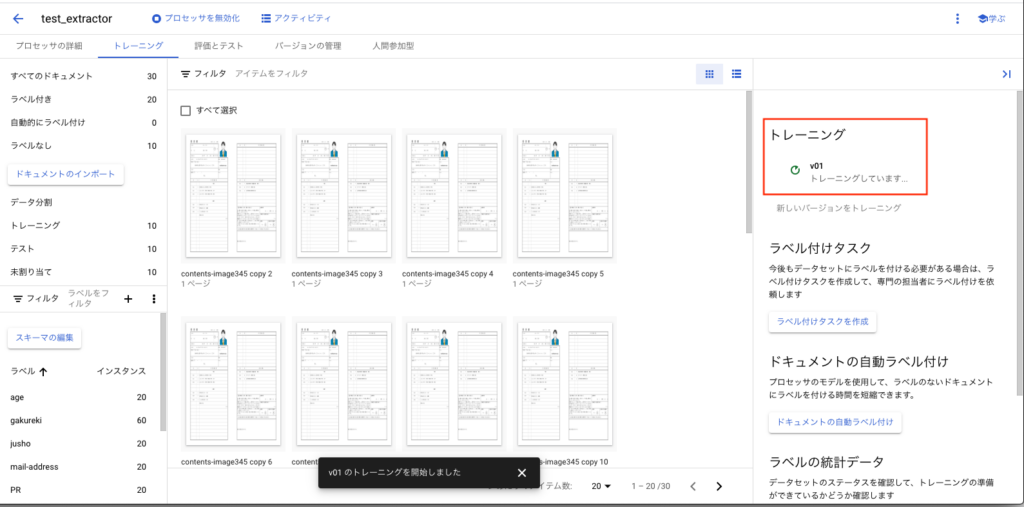
ラベル付が完了したらプロセッサの編集画面に戻り、下記のトレーニングボタンを押下します。

バージョンを適当に入力して、トレーニングを実行してください。
実行すると下記の画面のようにトレーニング中の状態となります。
しばらく時間を空けてください。
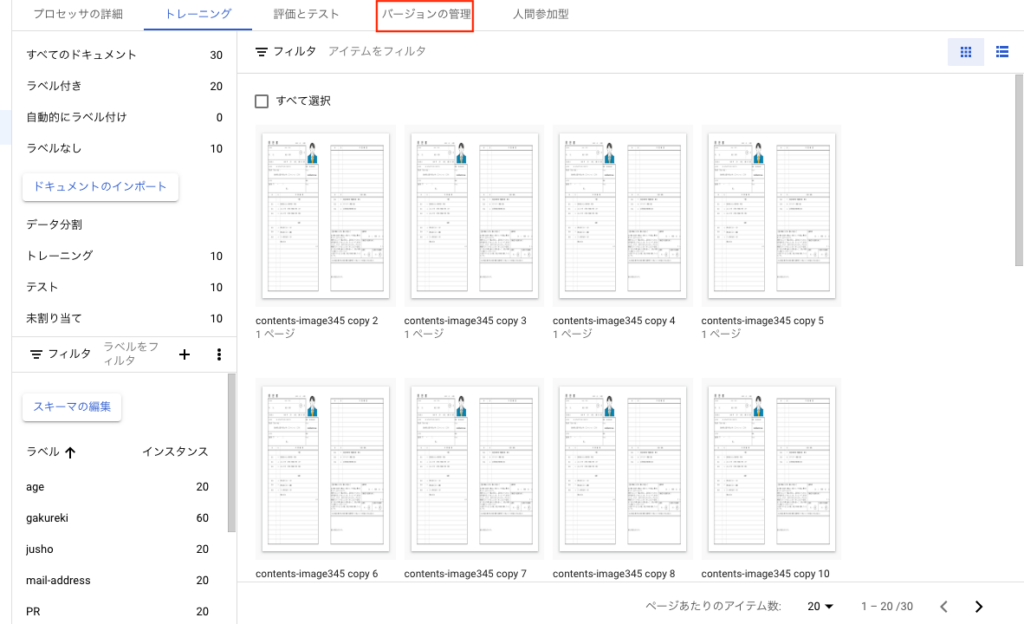
トレーニングが完了すると下記のように完了と表示されます。
次に[バージョンの管理]タブを押下します。
画面が遷移したら、対象のプロセッサを選択してデプロイタブを押下します。
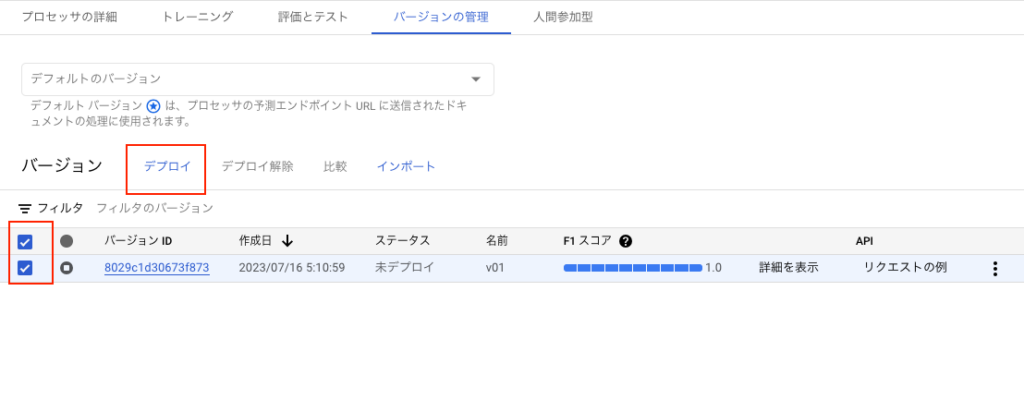
デプロイ処理には時間がかかるため、少し時間を置きます。
デプロイ済みとなったら下記のように表示されます。

次にpythonからドキュメントを送信して、エンティティ分析するデモを作成します。
document-aiのライブラリがない場合は下記のコマンドでインストールしてください。
pip install google-cloud-documentaiGoogle公式ドキュメントからテストコードをコピーします。
https://cloud.google.com/document-ai/docs/send-request
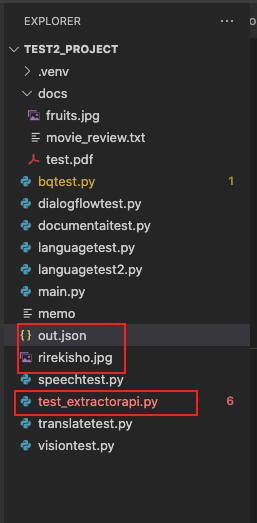
ディレクトリに下記のファイルを用意しておきます。
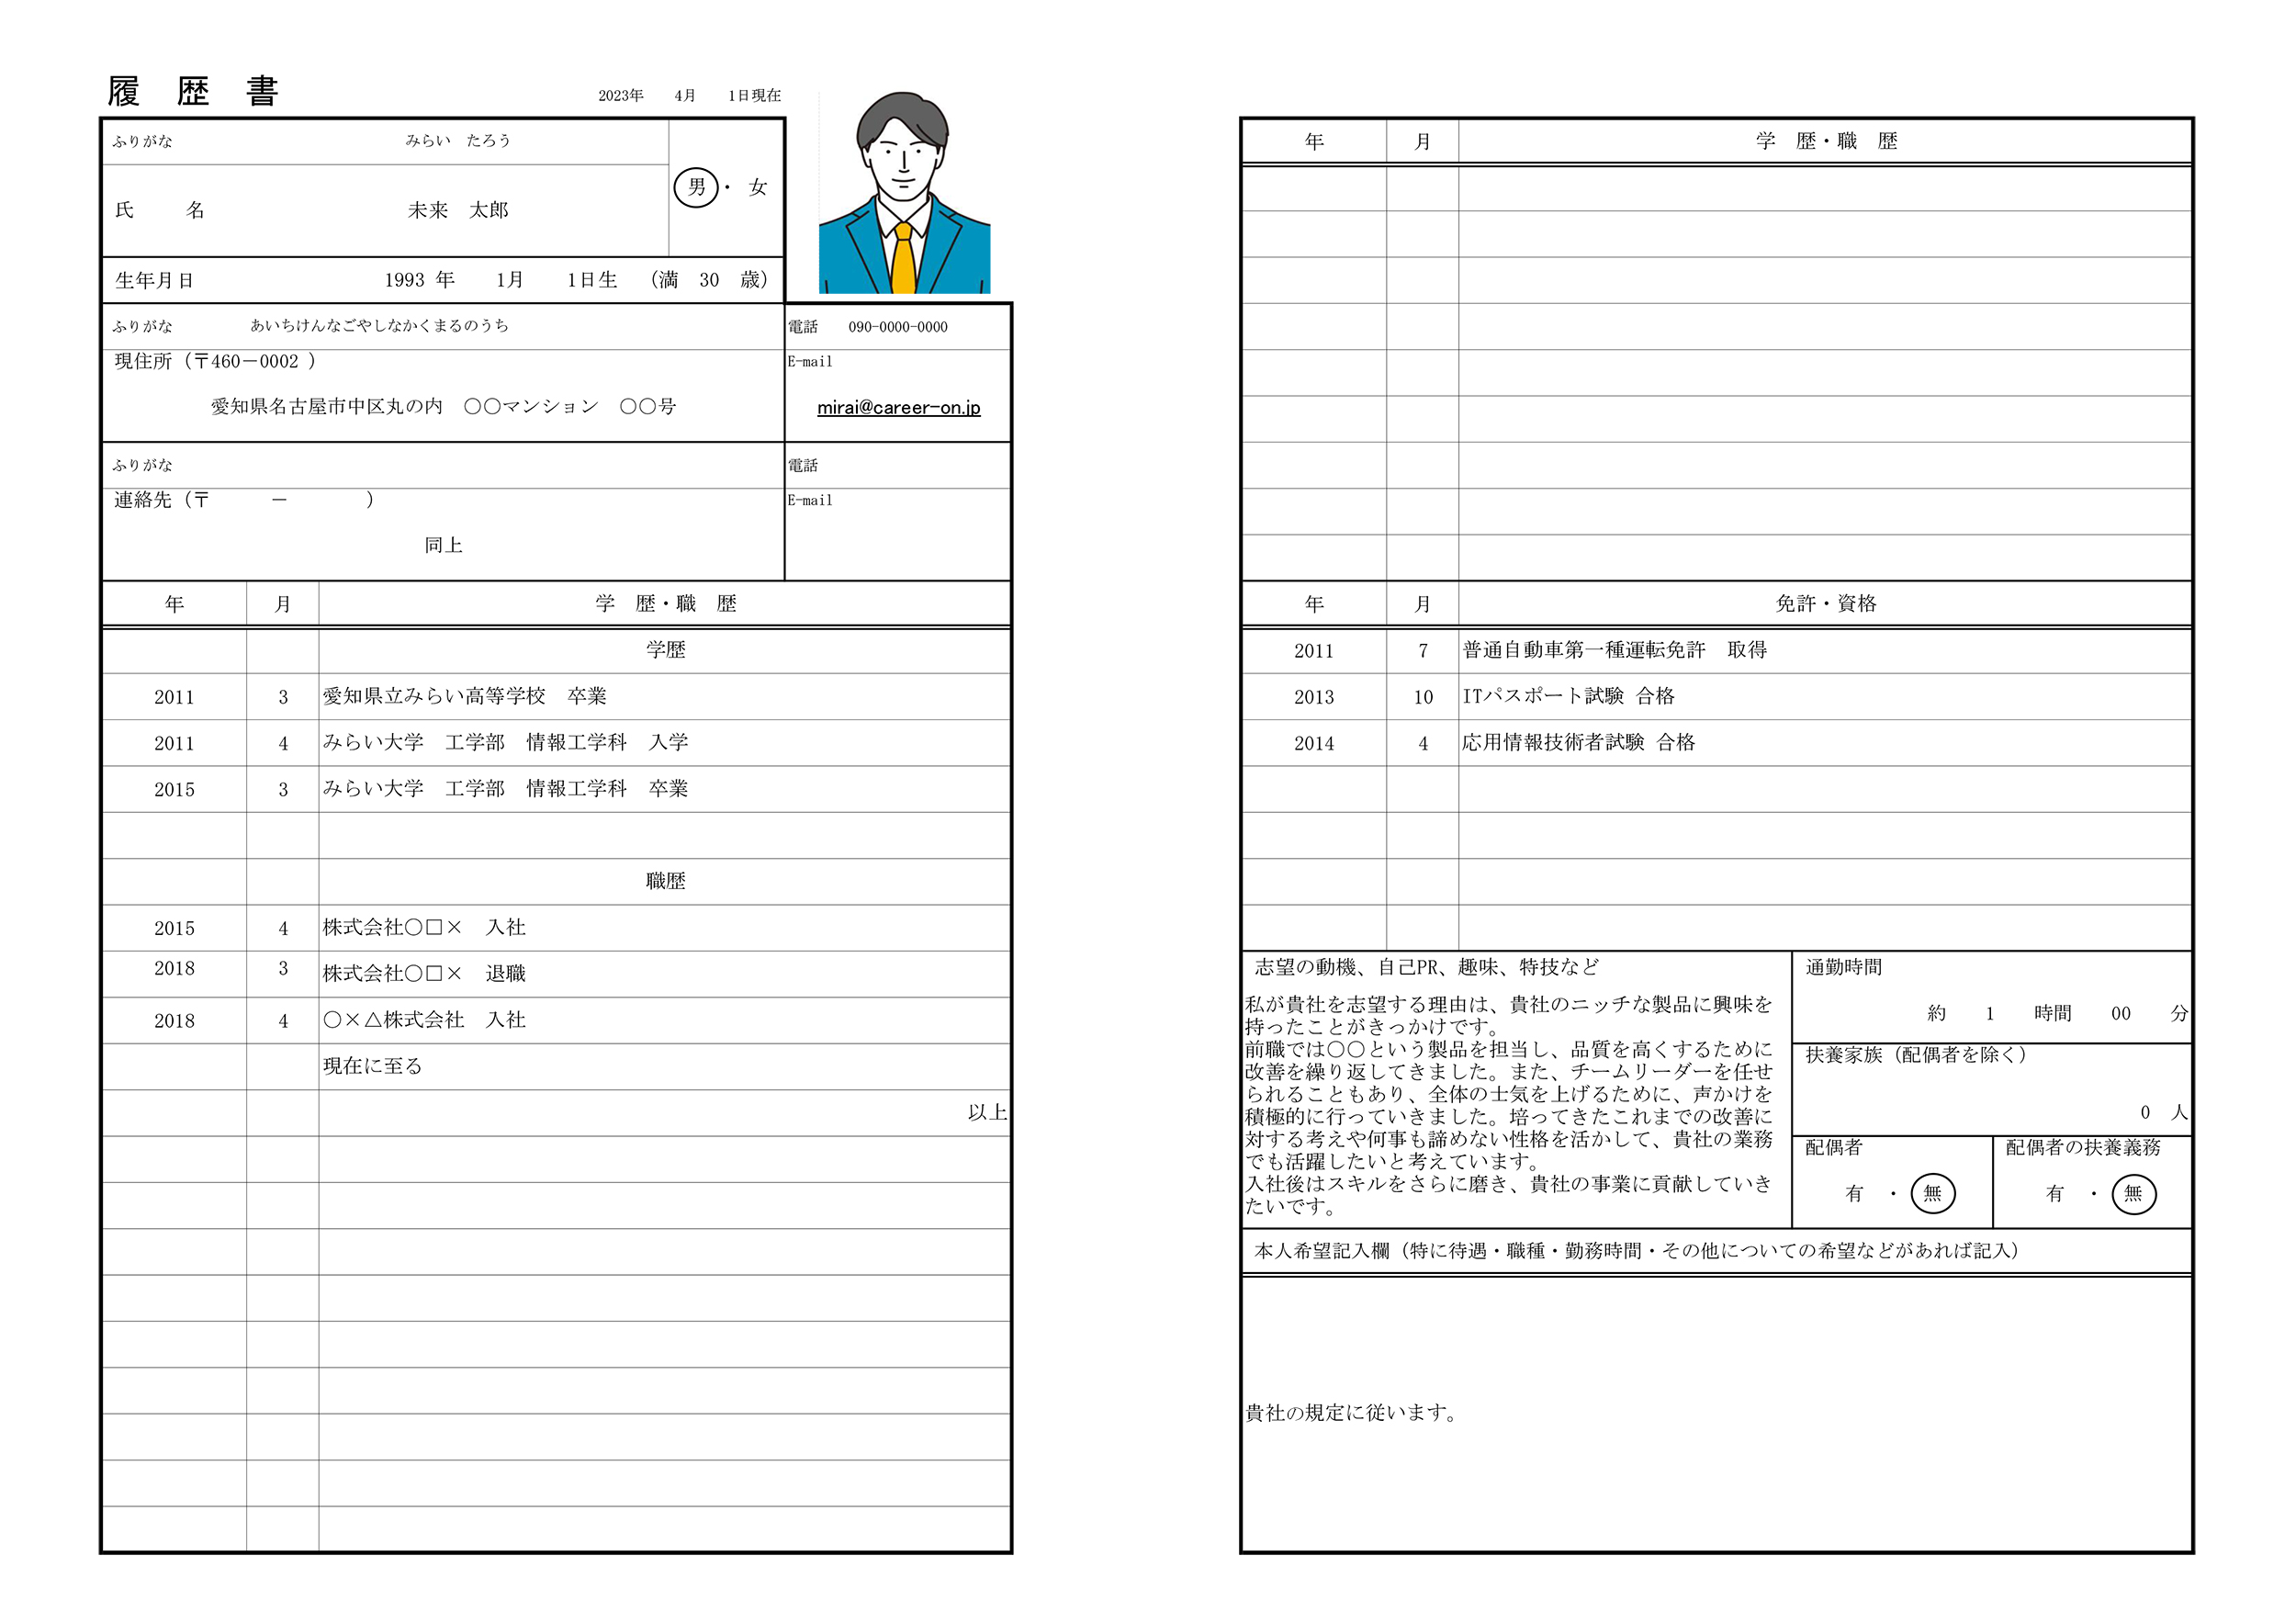
- rirekisho.jpg・・・・履歴書データ
- test_extractorapi.py・・・・DocumentAI APIのテストコード
- out.json・・・・取得結果を格納するJSONファイル
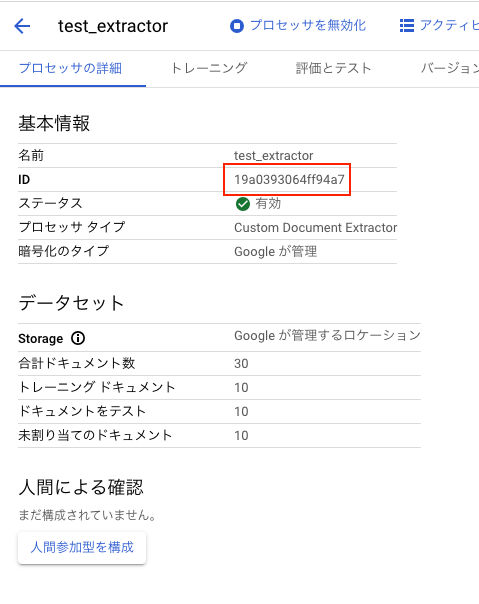
テストで使用するプロセッサIDとプロセッサバージョンIDを用意しておいてください。
プロセッサIDは下記の画面で確認できます。
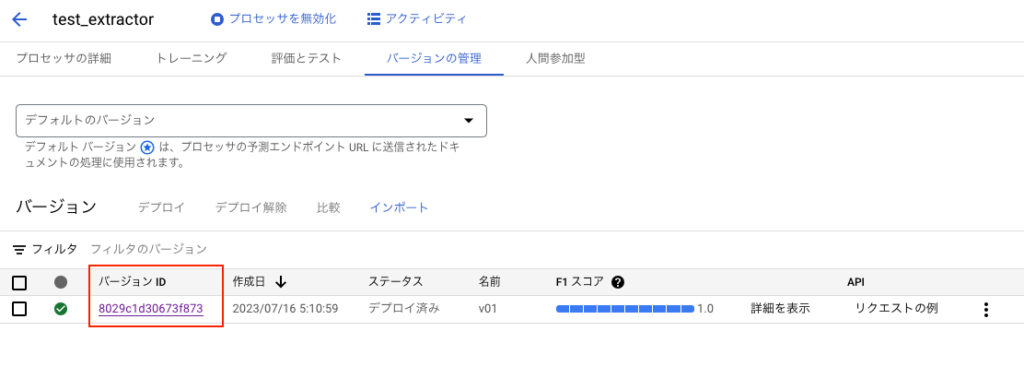
バージョンIDは下記の画面で確認できます。
下記が実行するソースコードです。
from typing import Optional

from google.api_core.client_options import ClientOptions
from google.cloud import documentai  # type: ignore

# TODO(developer): Uncomment these variables before running the sample.
# project_id = "YOUR_PROJECT_ID"
# location = "YOUR_PROCESSOR_LOCATION" # Format is "us" or "eu"
# processor_id = "YOUR_PROCESSOR_ID" # Create processor before running sample
# file_path = "/path/to/local/pdf"
# mime_type = "application/pdf" # Refer to https://cloud.google.com/document-ai/docs/file-types for supported file types
# field_mask = "text,entities,pages.pageNumber"  # Optional. The fields to return in the Document object.
# processor_version_id = "YOUR_PROCESSOR_VERSION_ID" # Optional. Processor version to use


def process_document_sample(
    project_id: str,
    location: str,
    processor_id: str,
    file_path: str,
    mime_type: str,
    field_mask: Optional[str] = None,
    processor_version_id: Optional[str] = None,
) -> None:
    # You must set the `api_endpoint` if you use a location other than "us".
    opts = ClientOptions(api_endpoint=f"{location}-documentai.googleapis.com")

    client = documentai.DocumentProcessorServiceClient(client_options=opts)

    if processor_version_id:
        # The full resource name of the processor version, e.g.:
        # `projects/{project_id}/locations/{location}/processors/{processor_id}/processorVersions/{processor_version_id}`
        name = client.processor_version_path(
            project_id, location, processor_id, processor_version_id
        )
    else:
        # The full resource name of the processor, e.g.:
        # `projects/{project_id}/locations/{location}/processors/{processor_id}`
        name = client.processor_path(project_id, location, processor_id)

    # Read the file into memory
    with open(file_path, "rb") as image:
        image_content = image.read()

    # Load binary data
    raw_document = documentai.RawDocument(content=image_content, mime_type=mime_type)

    # Configure the process request
    request = documentai.ProcessRequest(
        name=name, raw_document=raw_document, field_mask=field_mask
    )

    result = client.process_document(request=request)

    # For a full list of `Document` object attributes, reference this page:
    # https://cloud.google.com/document-ai/docs/reference/rest/v1/Document
    document = result.document

    # Read the text recognition output from the processor
    with open("out.json", "w") as f:
        print("The document contains the following text:")
        print(document.entities, file=f)


if __name__ == "__main__":
    process_document_sample(
        "<project_id>",
        "us",
        "<processor_id>",
        "<file_path>/rirekisho.jpg",
        "image/jpeg",
        None,
        "<version_id>"
    )
(.venv)MacBook-Pro:test2_project$ python3 test_extractorapi.py
The document contains the following text:実行後のout.jsonを確認してみましょう。
[text_anchor {
  text_segments {
    start_index: 499
    end_index: 733
  }
  content: "|私が貴社を志望する理由は、 貴社のニッチな製品に興味を\n持ったことがきっかけです。\n前職では○○という製品を担当し、 品質を高くするために\n|改善を繰り返してきました。 また、チームリーダーを任せ\nられることもあり、 全体の士気を上げるために、声かけを\n|積極的に行っていきました。 培ってきたこれまでの改善に\n|対する考えや何事も諦めない性格を活かして、貴社の業務\nでも活躍したいと考えています。\n入社後はスキルをさらに磨き、 貴社の事業に貢献していき\nたいです。"
}
type_: "PR"
mention_text: "|私が貴社を志望する理由は、 貴社のニッチな製品に興味を\n持ったことがきっかけです。\n前職では○○という製品を担当し、 品質を高くするために\n|改善を繰り返してきました。 また、チームリーダーを任せ\nられることもあり、 全体の士気を上げるために、声かけを\n|積極的に行っていきました。 培ってきたこれまでの改善に\n|対する考えや何事も諦めない性格を活かして、貴社の業務\nでも活躍したいと考えています。\n入社後はスキルをさらに磨き、 貴社の事業に貢献していき\nたいです。"
confidence: 0.995778918
page_anchor {
  page_refs {
    bounding_poly {
      normalized_vertices {
        x: 0.5388
        y: 0.612903237
      }
      normalized_vertices {
        x: 0.7724
        y: 0.612903237
      }
      normalized_vertices {
        x: 0.7724
        y: 0.749292612
      }
      normalized_vertices {
        x: 0.5388
        y: 0.749292612
      }
    }
  }
}
id: "0"
, text_anchor {
  text_segments {
    start_index: 77
    end_index: 79
  }
  content: "30"
}
type_: "age"
mention_text: "30"
confidence: 0.998875141
page_anchor {
  page_refs {
    bounding_poly {
      normalized_vertices {
        x: 0.3048
        y: 0.16694963
      }
      normalized_vertices {
        x: 0.3128
        y: 0.16694963
      }
      normalized_vertices {
        x: 0.3128
        y: 0.177702323
      }
      normalized_vertices {
        x: 0.3048
        y: 0.177702323
      }
    }
  }
}
id: "1"
normalized_value {
  text: "30"
}
, text_anchor {
  text_segments {
    start_index: 269
    end_index: 284
  }
  content: "|愛知県立みらい高等学校 卒業"
}
type_: "gakureki"
mention_text: "|愛知県立みらい高等学校 卒業"
confidence: 0.980428696
page_anchor {
  page_refs {
    bounding_poly {
      normalized_vertices {
        x: 0.1376
        y: 0.422750413
      }
      normalized_vertices {
        x: 0.2632
        y: 0.422750413
      }
      normalized_vertices {
        x: 0.2632
        y: 0.434634984
      }
      normalized_vertices {
        x: 0.1376
        y: 0.434634984
      }
    }
  }
}
id: "2"
, text_anchor {
  text_segments {
    start_index: 314
    end_index: 333
  }
  content: "|みらい大学 工学部 情報工学科 入学"
}
type_: "gakureki"
mention_text: "|みらい大学 工学部 情報工学科 入学"
confidence: 0.936911047
page_anchor {
  page_refs {
    bounding_poly {
      normalized_vertices {
        x: 0.1372
        y: 0.451046973
      }
      normalized_vertices {
        x: 0.3
        y: 0.451046973
      }
      normalized_vertices {
        x: 0.3
        y: 0.462931514
      }
      normalized_vertices {
        x: 0.1372
        y: 0.462931514
      }
    }
  }
}
id: "3"
, text_anchor {
  text_segments {
    start_index: 361
    end_index: 379
  }
  content: "みらい大学 工学部 情報工学科 卒業"
}
type_: "gakureki"
mention_text: "みらい大学 工学部 情報工学科 卒業"
confidence: 0.973792732
page_anchor {
  page_refs {
    bounding_poly {
      normalized_vertices {
        x: 0.1408
        y: 0.479343534
      }
      normalized_vertices {
        x: 0.2996
        y: 0.479343534
      }
      normalized_vertices {
        x: 0.2996
        y: 0.491228074
      }
      normalized_vertices {
        x: 0.1408
        y: 0.491228074
      }
    }
  }
}
id: "4"
, text_anchor {
  text_segments {
    start_index: 147
    end_index: 171
  }
  content: "愛知県名古屋市中区丸の内 ○○マンション ○○号"
}
type_: "jusho"
mention_text: "愛知県名古屋市中区丸の内 ○○マンション ○○号"
confidence: 0.987321258
page_anchor {
  page_refs {
    bounding_poly {
      normalized_vertices {
        x: 0.0916
        y: 0.244482175
      }
      normalized_vertices {
        x: 0.294
        y: 0.244482175
      }
      normalized_vertices {
        x: 0.294
        y: 0.255800784
      }
      normalized_vertices {
        x: 0.0916
        y: 0.255800784
      }
    }
  }
}
id: "5"
, text_anchor {
  text_segments {
    start_index: 172
    end_index: 190
  }
  content: "mirai@career-on.jp"
}
type_: "mail-address"
mention_text: "mirai@career-on.jp"
confidence: 0.99887979
page_anchor {
  page_refs {
    bounding_poly {
      normalized_vertices {
        x: 0.356
        y: 0.245614037
      }
      normalized_vertices {
        x: 0.4268
        y: 0.245614037
      }
      normalized_vertices {
        x: 0.4268
        y: 0.255800784
      }
      normalized_vertices {
        x: 0.356
        y: 0.255800784
      }
    }
  }
}
id: "6"
, text_anchor {
  text_segments {
    start_index: 41
    end_index: 42
  }
  content: "男"
}
type_: "seibetsu"
mention_text: "男"
confidence: 0.966850638
page_anchor {
  page_refs {
    bounding_poly {
      normalized_vertices {
        x: 0.2984
        y: 0.109224677
      }
      normalized_vertices {
        x: 0.3076
        y: 0.109224677
      }
      normalized_vertices {
        x: 0.3076
        y: 0.120543294
      }
      normalized_vertices {
        x: 0.2984
        y: 0.120543294
      }
    }
  }
}
id: "7"
, text_anchor {
  text_segments {
    start_index: 61
    end_index: 73
  }
  content: "1993年\n1月\n1日生"
}
type_: "seinengappi"
mention_text: "1993年\n1月\n1日生"
confidence: 0.996708632
page_anchor {
  page_refs {
    bounding_poly {
      normalized_vertices {
        x: 0.168
        y: 0.166383699
      }
      normalized_vertices {
        x: 0.2688
        y: 0.166383699
      }
      normalized_vertices {
        x: 0.2688
        y: 0.177136391
      }
      normalized_vertices {
        x: 0.168
        y: 0.177136391
      }
    }
  }
}
id: "8"
, text_anchor {
  text_segments {
    start_index: 245
    end_index: 261
  }
  content: "|普通自動車第一種運転免許 取得"
}
type_: "shikaku"
mention_text: "|普通自動車第一種運転免許 取得"
confidence: 0.860587597
page_anchor {
  page_refs {
    bounding_poly {
      normalized_vertices {
        x: 0.6344
        y: 0.393887937
      }
      normalized_vertices {
        x: 0.7692
        y: 0.393887937
      }
      normalized_vertices {
        x: 0.7692
        y: 0.405772507
      }
      normalized_vertices {
        x: 0.6344
        y: 0.405772507
      }
    }
  }
}
id: "9"
, text_anchor {
  text_segments {
    start_index: 294
    end_index: 306
  }
  content: "ITパスポート試験 合格"
}
type_: "shikaku"
mention_text: "ITパスポート試験 合格"
confidence: 0.919623852
page_anchor {
  page_refs {
    bounding_poly {
      normalized_vertices {
        x: 0.6372
        y: 0.422750413
      }
      normalized_vertices {
        x: 0.7288
        y: 0.422750413
      }
      normalized_vertices {
        x: 0.7288
        y: 0.433503121
      }
      normalized_vertices {
        x: 0.6372
        y: 0.433503121
      }
    }
  }
}
id: "10"
, text_anchor {
  text_segments {
    start_index: 341
    end_index: 353
  }
  content: "応用情報技術者試験 合格"
}
type_: "shikaku"
mention_text: "応用情報技術者試験 合格"
confidence: 0.958599746
page_anchor {
  page_refs {
    bounding_poly {
      normalized_vertices {
        x: 0.6364
        y: 0.45161289
      }
      normalized_vertices {
        x: 0.7384
        y: 0.45161289
      }
      normalized_vertices {
        x: 0.7384
        y: 0.462931514
      }
      normalized_vertices {
        x: 0.6364
        y: 0.462931514
      }
    }
  }
}
id: "11"
, text_anchor {
  text_segments {
    start_index: 51
    end_index: 55
  }
  content: "未来太郎"
}
type_: "shimei"
mention_text: "未来太郎"
confidence: 0.991285205
page_anchor {
  page_refs {
    bounding_poly {
      normalized_vertices {
        x: 0.1776
        y: 0.122241087
      }
      normalized_vertices {
        x: 0.2212
        y: 0.122241087
      }
      normalized_vertices {
        x: 0.2212
        y: 0.135257497
      }
      normalized_vertices {
        x: 0.1776
        y: 0.135257497
      }
    }
  }
}
id: "12"
, text_anchor {
  text_segments {
    start_index: 390
    end_index: 401
  }
  content: "|株式会社○□× 入社"
}
type_: "shokureki"
mention_text: "|株式会社○□× 入社"
confidence: 0.857088
page_anchor {
  page_refs {
    bounding_poly {
      normalized_vertices {
        x: 0.1376
        y: 0.56479907
      }
      normalized_vertices {
        x: 0.2292
        y: 0.56479907
      }
      normalized_vertices {
        x: 0.2292
        y: 0.57668364
      }
      normalized_vertices {
        x: 0.1376
        y: 0.57668364
      }
    }
  }
}
id: "13"
, text_anchor {
  text_segments {
    start_index: 409
    end_index: 420
  }
  content: "|株式会社○□× 退職"
}
type_: "shokureki"
mention_text: "|株式会社○□× 退職"
confidence: 0.84830147
page_anchor {
  page_refs {
    bounding_poly {
      normalized_vertices {
        x: 0.1376
        y: 0.593661547
      }
      normalized_vertices {
        x: 0.23
        y: 0.593661547
      }
      normalized_vertices {
        x: 0.23
        y: 0.604980171
      }
      normalized_vertices {
        x: 0.1376
        y: 0.604980171
      }
    }
  }
}
id: "14"
, text_anchor {
  text_segments {
    start_index: 456
    end_index: 467
  }
  content: "|○×△株式会社 入社"
}
type_: "shokureki"
mention_text: "|○×△株式会社 入社"
confidence: 0.921739578
page_anchor {
  page_refs {
    bounding_poly {
      normalized_vertices {
        x: 0.1396
        y: 0.621958137
      }
      normalized_vertices {
        x: 0.2288
        y: 0.621958137
      }
      normalized_vertices {
        x: 0.2288
        y: 0.633842647
      }
      normalized_vertices {
        x: 0.1396
        y: 0.633842647
      }
    }
  }
}
id: "15"
]
以上がDocumentAIのカスタムプロセッサの作成方法と使い方でした。
「[A-00100]DocumentAIのCustomProcessorを作成する」への0件のコメント