[A-00115]GCPでGStreamerを使ってみる
gcpでgstreamerを使用してストリーム配信のデモをやってみます。
ストリーム配信というのは誤りかもしれません。gcpのVertexAI ApplicationにGStreamerからデータを流し込むだけです。
参考文献は下記
https://cloud.google.com/iam/docs/permissions-change-log
https://cloud.google.com/vision-ai/docs/cloud-environment
https://codelabs.developers.google.com/vertex-ai-vision-queue-detection#0
https://arkgame.com/2022/03/12/post-305802/
https://softpot.livedoor.blog/archives/13466322.html
https://softpot.livedoor.blog/archives/13541697.html
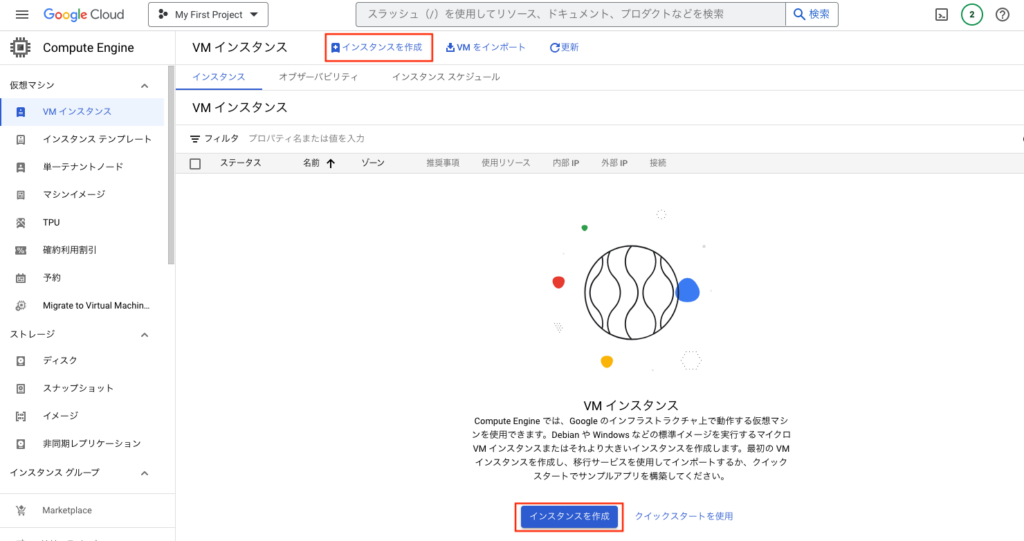
・Compute Engineを作成する
ローカルがUbuntuなどのDebian系linuxであればローカルからでもOKです。
GCP上にCompute Engineを作成します。[インスタンスを作成]ボタンを押下します。
上下2つありますがどちらでも構いません。
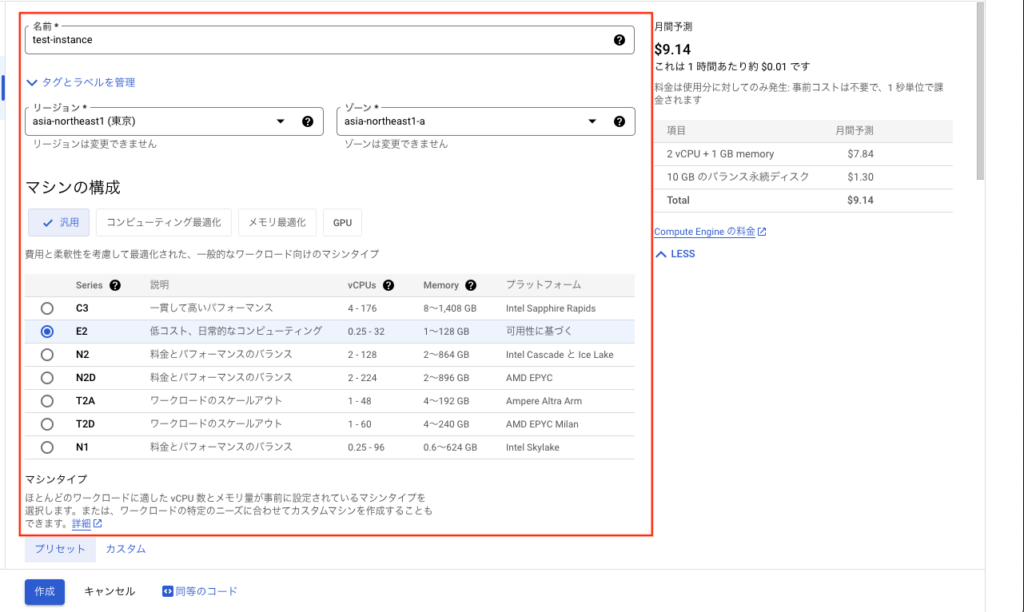
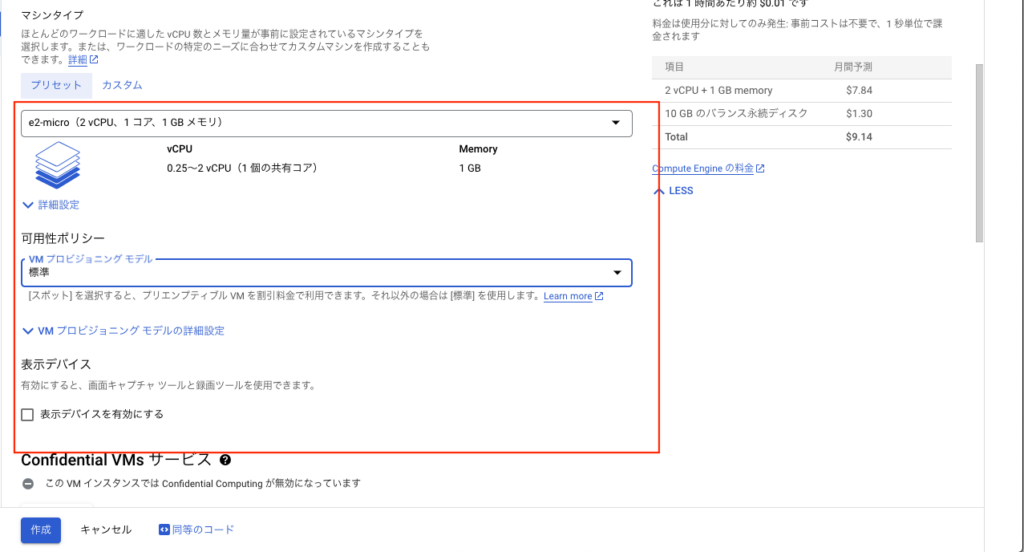
次にマシンタイプを選択していきます。特にパフォーマンスは求めないので最低ランクのアセットで設定していきます。
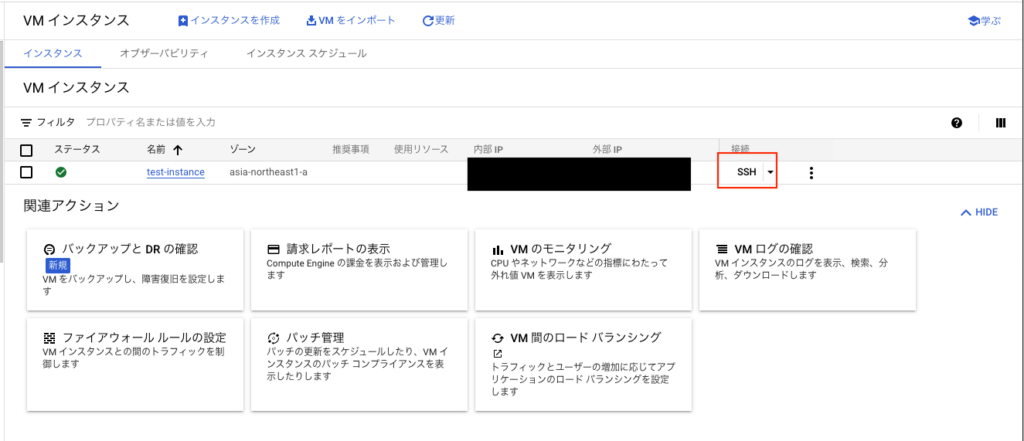
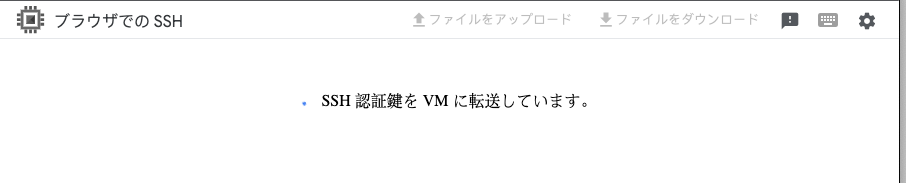
作成ボタンを押下して時間が経過すると下記のようにSSHでアクセスできるようになります。SSHボタンを押下してください。
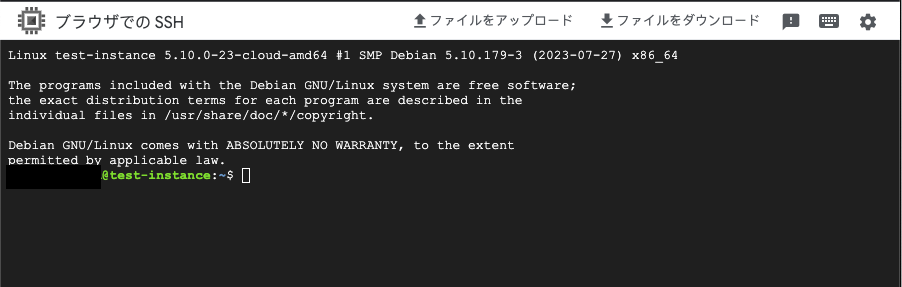
無事にログインできたら下記のようにSSH接続できます。
・GStreamerをインストールする
gstreamerの資材はc言語ソースのため、GNUコンパイラ(gcc)をインストールします。
sudo apt install build-essential途中質問がきますが全てYesで良いです。完了まで少し時間がかかります。
インストールが完了したら念のため、バージョン確認します。
gcc --versiontest-instance:~$ gcc --version
gcc (Debian 10.2.1-6) 10.2.1 20210110
Copyright (C) 2020 Free Software Foundation, Inc.
This is free software; see the source for copying conditions. There is NO
warranty; not even for MERCHANTABILITY or FITNESS FOR A PARTICULAR PURPOSE.次にgitをインストールします。こちらも質問にはYesで回答します。インストールには時間がかかります。
インストール中にエラーが出るかもしれませんが、特に気にせず先に進めてください。
sudo apt-get install git-all次にgstreamerをインストールしていきます。
sudo apt install libgstreamer1.0-0 gstreamer1.0-tools途中で質問がありますが、Yesにしてください。
次に下記のプラグインインストールを実行します。これらも途中で質問が出ますので全てYesです。
sudo apt install gstreamer1.0-plugins-basesudo apt install gstreamer1.0-plugins-goodsudo apt install gstreamer1.0-plugins-badsudo apt install gstreamer1.0-plugins-ugly次にRTSP(Real Time Streaming Protocol)サーバーをインストールしていきます。
sudo apt install libgstrtspserver-1.0-dev・GStreamerを動かしてみる
次にgitからgstreamerのサンプルソースを取得します。
git clone git://anongit.freedesktop.org/gstreamer/gst-rtsp-server下記のようにダウンロードできていればOKです。
test-instance:~$ ls
gst-rtsp-server
次にgitのブランチを切り替えます。
cd gst-rtsp-server/
git checkout 1.4
test-instance:~$ cd gst-rtsp-server/
test-instance:~/gst-rtsp-server$ git checkout 1.4
Branch '1.4' set up to track remote branch '1.4' from 'origin'.
Switched to a new branch '1.4'次にexamplesディレクトリ配下にあるソースをコンパイルします。
cd examples/
gcc -o test-launch test-launch.c `pkg-config --cflags --libs gstreamer-rtsp-server-1.0`
下記のように実行ファイル(拡張子なし)が作成できていれば完了です。

ファイルを実行してみます。
./test-launch '( videotestsrc ! x264enc ! rtph264pay name=pay0 pt=96 )'test-instance:~/gst-rtsp-server/examples$ ./test-launch '( videotestsrc ! x264enc ! rtph264pay name=pay0 pt=96 )'
stream ready at rtsp://127.0.0.1:8554/test一旦、GStreamerの動作確認はここまでです。Ctrl+Cでプロセスを終了してください。
・Vertex AI VisionのStreamを作成する。
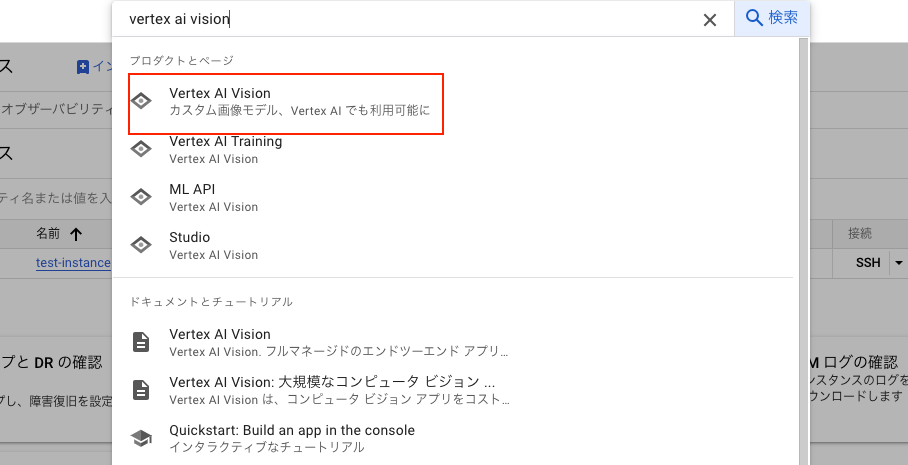
次にVertexAI VisionのStreamを作成します。
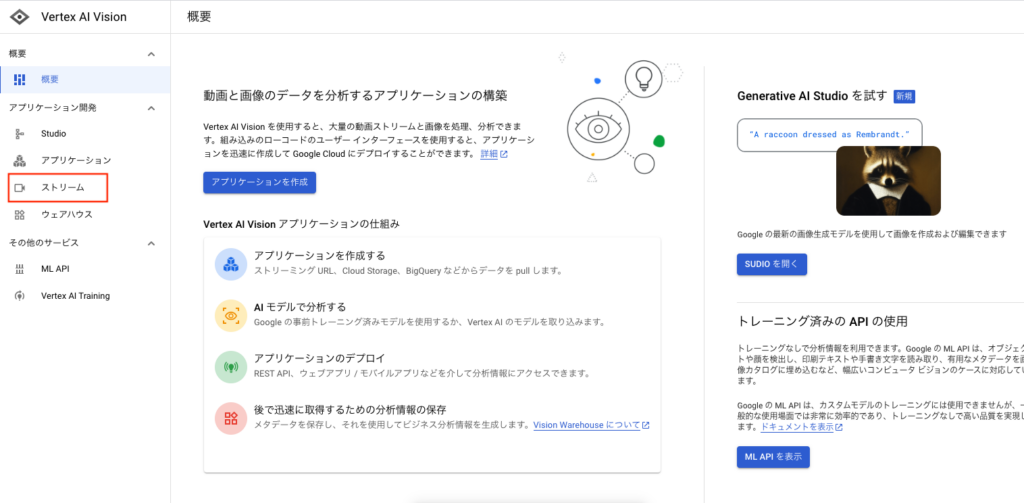
ダッシュボードの検索欄に[vertex ai vision]と入力して赤枠を選択します。
遷移後、ストリームを選択します。
作成ボタンを押下します。上下どちらでも構いません。
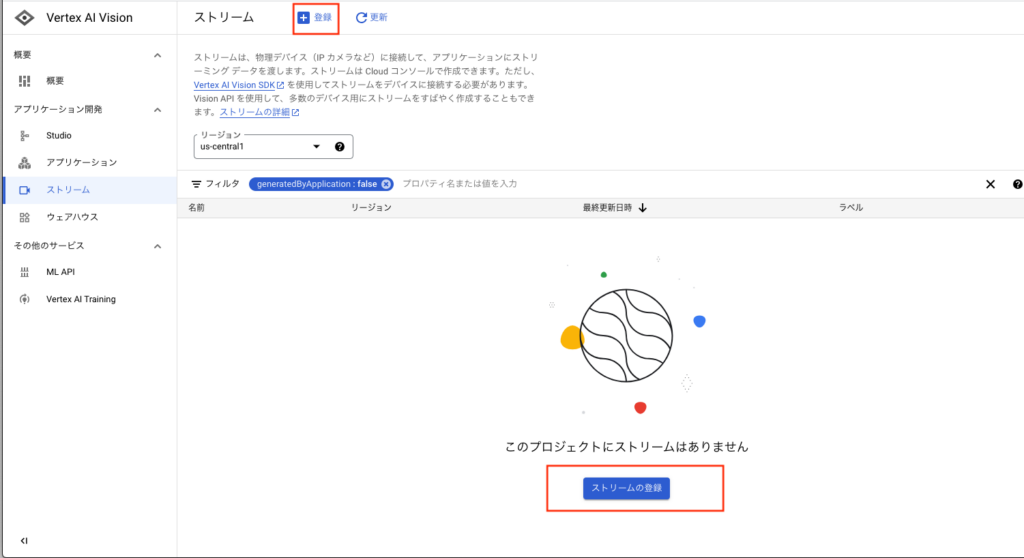
ストリーム名称に適当な名前をつけ、ロケーションを[us-central1]で作成します。
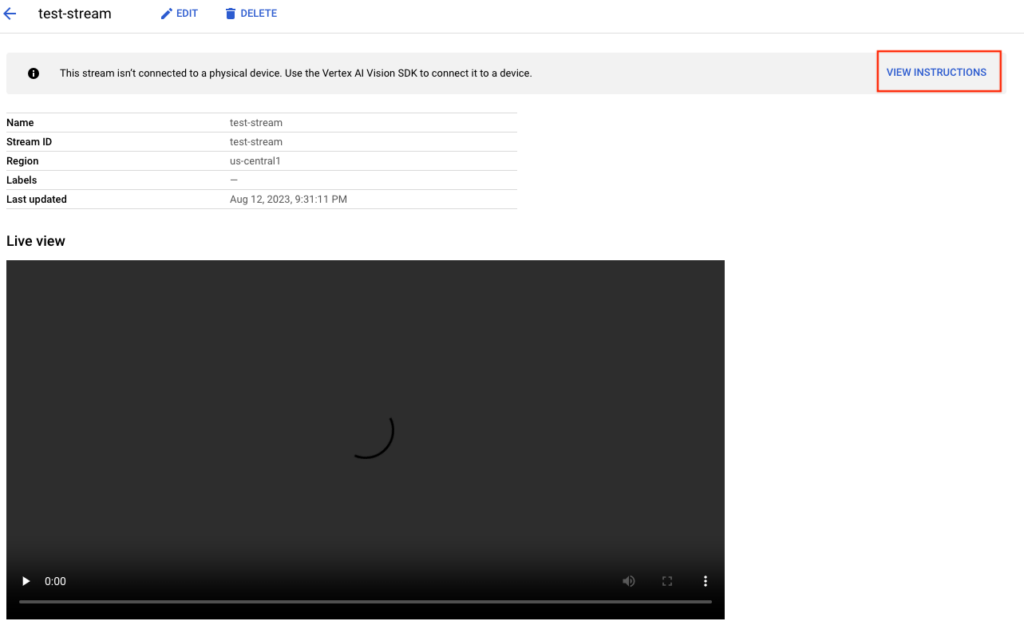
作成には時間がかかります。下記のようにストリーム名の箇所が青字でクリックできるようになれば完了です。

赤枠をクリックして下記の画面に移動して左上の[VIEW INSTRUCTION]をクリックします。
クリックすると下記のようにストリームを流し込む方法が記載されています。
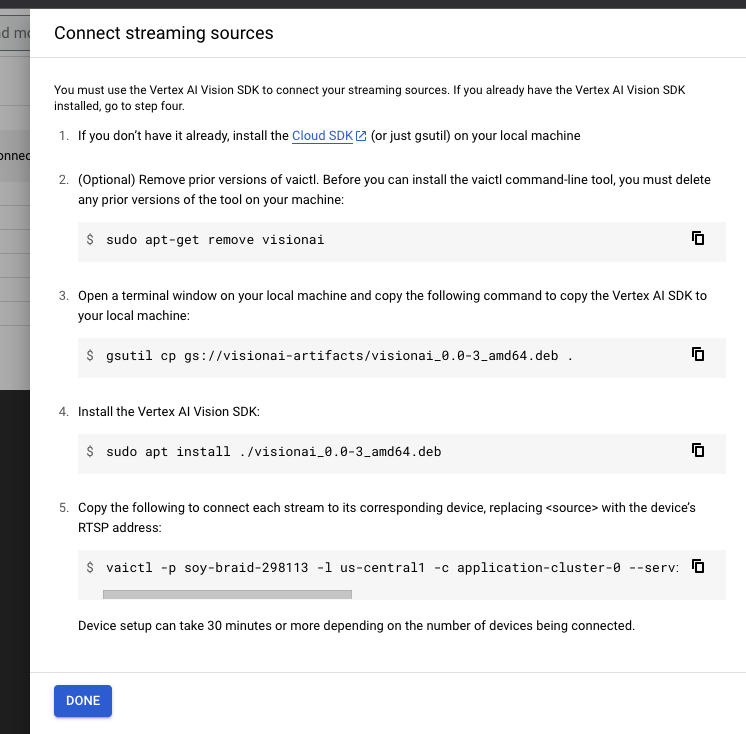
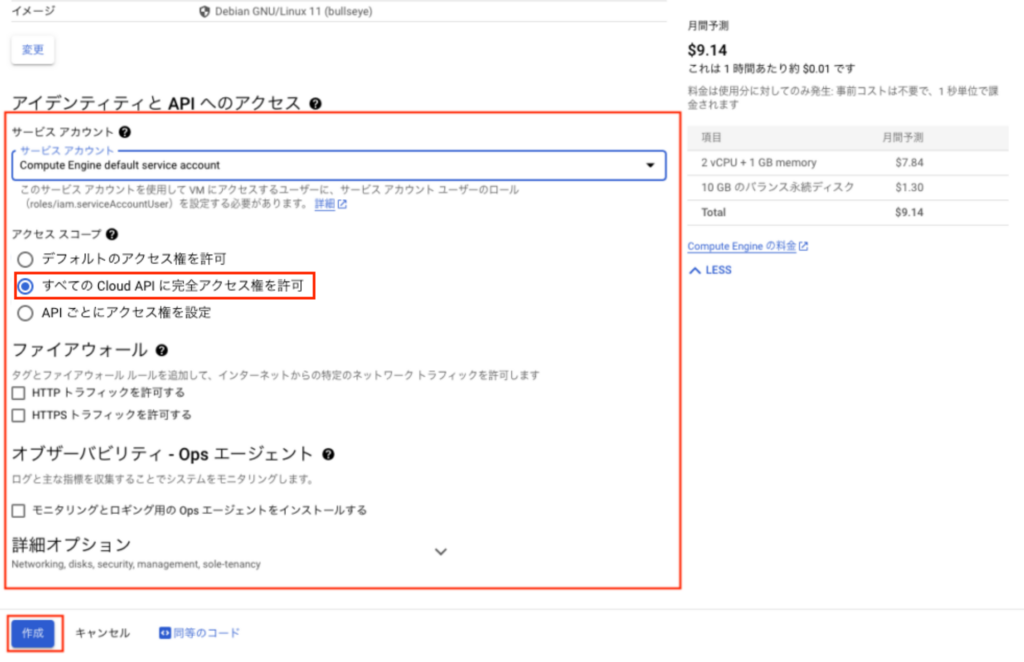
上記のコマンドをCompute Engineで実行していきますがその前にCompute Engineのサービスアカウントに権限を付与する必要があります。
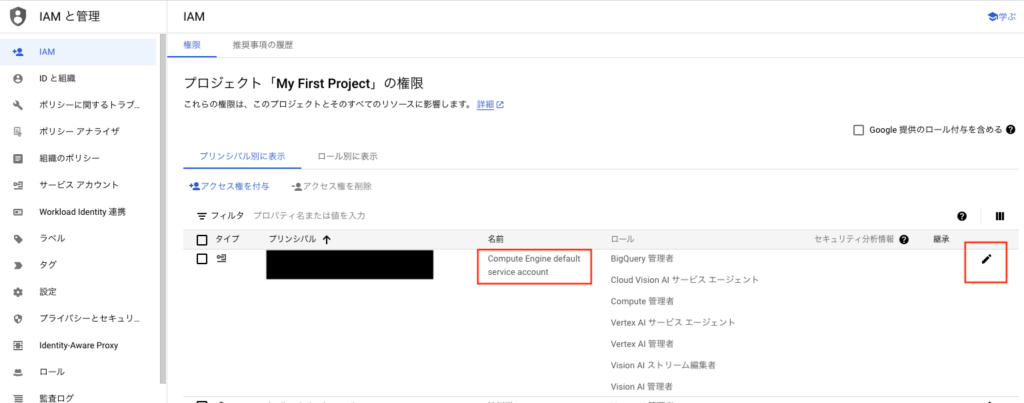
IAMロールの編集画面に移動し、対象のアカウントのロールを変更します。
Compute Engine default service accountが今回使用するアカウントです。右の鉛筆ボタンを押下して編集します。
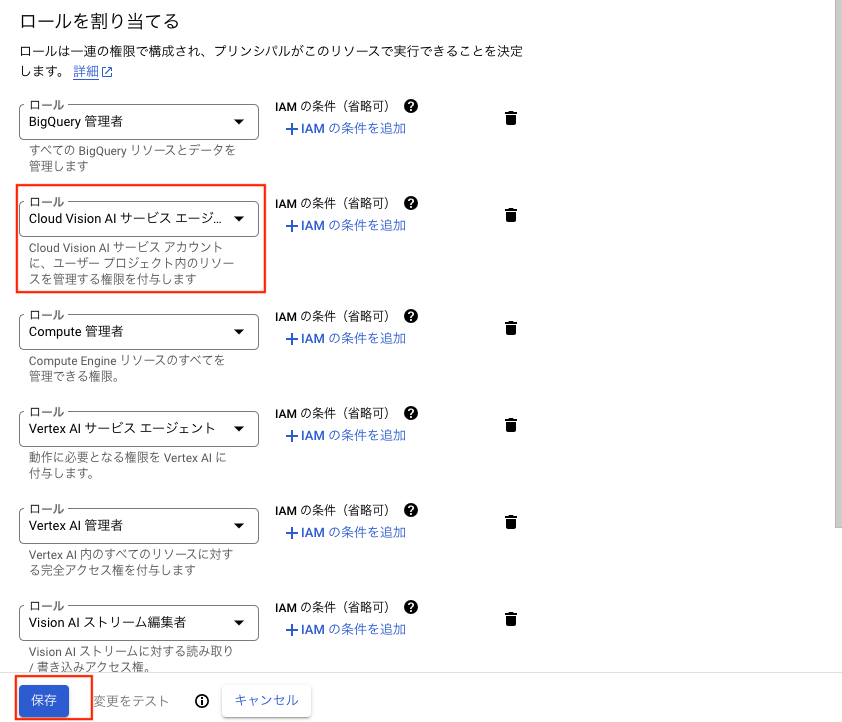
[Cloud Vision AI サービスエージェント]を追加して保存をします。
上記でIAMロールの設定は完了です。
次にCompute EngineにSSH接続してvision AIのAPIをインストールします。
sudo apt-get remove visionai2つ目のコマンドではgsutilを使用してインストールメディアをとってきますが、wgetを使用します。
wget https://github.com/google/visionai/releases/download/v0.0.5/visionai_0.0-5_amd64.debsudo apt install ./visionai_0.0-5_amd64.deb上記が完了したらvaictlがインストールされたことを確認するため、下記のコマンドを実行します。
vaictl --help@test-instance:~$ vaictl --help
This command line tool enables the user to
manage and interact with resources in Vision AI.
Usage:
vaictl [command]
Available Commands:
completion Generate the autocompletion script for the specified shell
create Create API resources in Vision AI.
delete Delete API resources in Vision AI.
disable Disable features for specific resources in Vision AI.
enable Enable features for specific resources in Vision AI.
help Help about any command
list List API resources in Vision AI.
receive Receive data from Vision AI.
send Send data to Vision AI.
Flags:
-c, --cluster-id string The cluster id.
-h, --help help for vaictl
-l, --location-id string The GCP location id.
-p, --project-id string The GCP project id.
--service-endpoint string The service endpoint for Vision AI. (default "visionai.googleapis.com")
--timeout int The default timeout (in seconds) for operations. (default 10)
-v, --verbose Verbose output.
Additional help topics:
vaictl describe Describe API resources in Vision AI.
Use "vaictl [command] --help" for more information about a command.・Streamにデータを流す
rtspサーバーを起動してvaictlでstreamにデータを流し込みます。
examplesディレクトリのtest-launchをバックグラウンドプロセスで再度実行します。
./test-launch '( videotestsrc ! x264enc ! rtph264pay name=pay0 pt=96 )' &次にvaictlでstreamに流すコマンドを実行します。
vaictl -p <project-id> -l us-central1 -c application-cluster-0 --service-endpoint visionai.googleapis.com send rtsp to streams <stream-name> --rtsp-uri rtsp://<source>@test-instance:~/gst-rtsp-server/examples$ vaictl -p xxxxxx -l us-central1 -c application-cluster-0 --service-endpoint visionai.googleapis.com send rtsp to streams test-stream --rtsp-uri rtsp://127.0.0.1:8554/test
I20230812 13:35:56.514180 1083 event_manager.cc:62] Generated event-id: bqncuwpz
I20230812 13:35:56.514675 1085 streams_event_writer.cc:45] An empty sender name was supplied; assigning the generated name "TOtom2bs".
GstMotionMetaAPI register.
Waiting for long running operation projects/xxxx/locations/us-central1/operations/operation-1691847358305-602b9e8ce53c9-0c0e02da-569e4a31 ⠋
Waiting for long running operation projects/xxxx/us-central1/operations/operation-1691847360180-602b9e8eaeffc-bb337f68-5dc806dd ⠇
I20230812 13:36:04.168937 1085 streams_event_writer.cc:76] Sending data into event "bqncuwpz" through stream "test-stream".上記を実行した後VertexAI Vision のStreamを確認します。
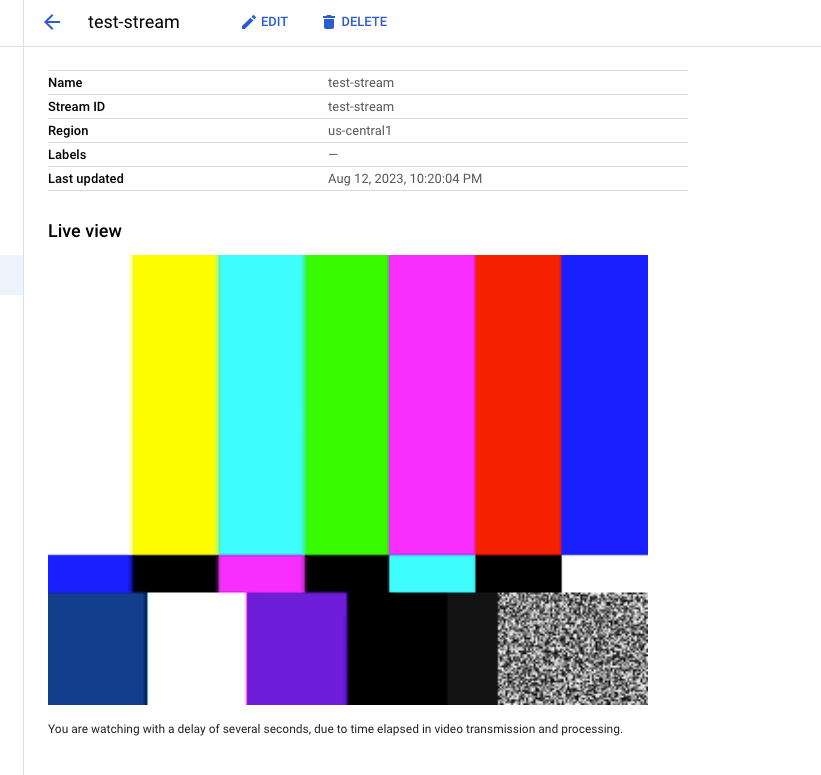
上記の通り、サンプル映像が流れます。
・オリジナル動画を配信してみる
examples/test-mp4.cをコンパイルしてオリジナルの動画をストリームに配信してみます。
gst-rtsp-server/examples配下で下記のコマンドを実行します。
まずtest-mp4.cを編集します。参考文献にある内容の通り、「”d. ! queue ! rtpmp4apay pt=97 name=pay1 “」を削除して下記の内容となります。
/* GStreamer
 * Copyright (C) 2008 Wim Taymans <wim.taymans at gmail.com>
 *
 * This library is free software; you can redistribute it and/or
 * modify it under the terms of the GNU Library General Public
 * License as published by the Free Software Foundation; either
 * version 2 of the License, or (at your option) any later version.
 *
 * This library is distributed in the hope that it will be useful,
 * but WITHOUT ANY WARRANTY; without even the implied warranty of
 * MERCHANTABILITY or FITNESS FOR A PARTICULAR PURPOSE.  See the GNU
 * Library General Public License for more details.
 *
 * You should have received a copy of the GNU Library General Public
 * License along with this library; if not, write to the
 * Free Software Foundation, Inc., 51 Franklin St, Fifth Floor,
 * Boston, MA 02110-1301, USA.
 */

#include <gst/gst.h>

#include <gst/rtsp-server/rtsp-server.h>

int
main (int argc, char *argv[])
{
  GMainLoop *loop;
  GstRTSPServer *server;
  GstRTSPMountPoints *mounts;
  GstRTSPMediaFactory *factory;
  gchar *str;

  gst_init (&argc, &argv);

  if (argc < 2) {
    g_message ("usage: %s <filename.mp4>", argv[0]);
    return -1;
  }

  loop = g_main_loop_new (NULL, FALSE);

  /* create a server instance */
  server = gst_rtsp_server_new ();

  /* get the mount points for this server, every server has a default object
   * that be used to map uri mount points to media factories */
  mounts = gst_rtsp_server_get_mount_points (server);

  str = g_strdup_printf ("( "
      "filesrc location=%s ! qtdemux name=d "
      "d. ! queue ! rtph264pay pt=96 name=pay0 " ")", argv[1]);

  /* make a media factory for a test stream. The default media factory can use
   * gst-launch syntax to create pipelines.
   * any launch line works as long as it contains elements named pay%d. Each
   * element with pay%d names will be a stream */
  factory = gst_rtsp_media_factory_new ();
  gst_rtsp_media_factory_set_launch (factory, str);
  g_free (str);

  /* attach the test factory to the /test url */
  gst_rtsp_mount_points_add_factory (mounts, "/test", factory);

  /* don't need the ref to the mapper anymore */
  g_object_unref (mounts);

  /* attach the server to the default maincontext */
  gst_rtsp_server_attach (server, NULL);

  /* start serving */
  g_print ("stream ready at rtsp://127.0.0.1:8554/test\n");
  g_main_loop_run (loop);

  return 0;
}
編集後、下記のコマンドでコンパイルします。
gcc -o test-mp4 test-mp4.c `pkg-config --cflags --libs gstreamer-rtsp-server-1.0`下記のとおり、test-mp4の実行ファイルが作成された状態になります。

下記のコマンドでtest-mp4を実行します。読み込むmp4ファイルは適当に用意して実行してください。
下記はサンプル動画です。
wget -q https://github.com/vagrantism/interesting-datasets/raw/main/video/collective_activity/seq25_h264.mp4./test-mp4 <mp4file-path> &@test-instance:~/gst-rtsp-server/examples$ ./test-mp4 /home/anonymous/seq25_h264.mp4 &
[1] 1057
@test-instance:~/gst-rtsp-server/examples$ stream ready at rtsp://127.0.0.1:8554/test次にストリームへ流します。
@test-instance:~/gst-rtsp-server/examples$ vaictl -p xxxx -l us-central1 -c application-cluster-0 --service-endpoint visionai.googleapis.com send rtsp to streams test-stream --rtsp-uri rtsp://127.0.0.1:8554/test
I20230812 15:35:24.632941 1065 event_manager.cc:62] Generated event-id: ex75bj3l
I20230812 15:35:24.634831 1068 streams_event_writer.cc:45] An empty sender name was supplied; assigning the generated name "AiCETMJ5".
GstMotionMetaAPI register.
Waiting for long running operation projects/xxxx/locations/us-central1/operations/operation-1691854526479-602bb940ffc4f-22d47c10-745bfe09 ⠙
Waiting for long running operation projects/xxxx/locations/us-central1/operations/operation-1691854528457-602bb942e2bc9-3f09892b-0005bb43 ⠇
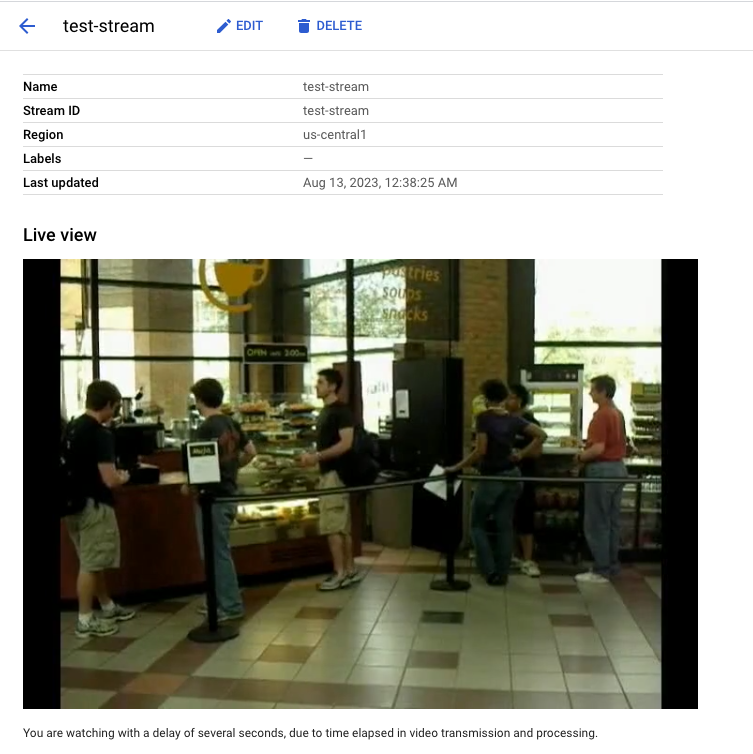
I20230812 15:35:32.439006 1068 streams_event_writer.cc:76] Sending data into event "ex75bj3l" through stream "test-stream".下記のとおり、オリジナル動画が表示されたらOKです。
コメントを残す